How do I enroll in ADSelfService Plus?
ADSelfService Plus authenticates your identity using the information you provide during the enrollment process. Enrollment is mandatory for:
- Multi-factor authentication (MFA) during machine, VPN, OWA, and enterprise application logins if the feature has been configured for these endpoints by the administrator.
- Self-service password reset and account unlock using the product.
- Offline MFA during local and remote Windows logins and User Account Control prompts if your administrator has configured the feature. Click here to know more about enrollment for offline MFA.
Note: Your admin might choose to enforce any or all the authentication techniques available in ADSelfService Plus. Based on that, you'll be required to provide the required information.
Enrollment using security question and answers
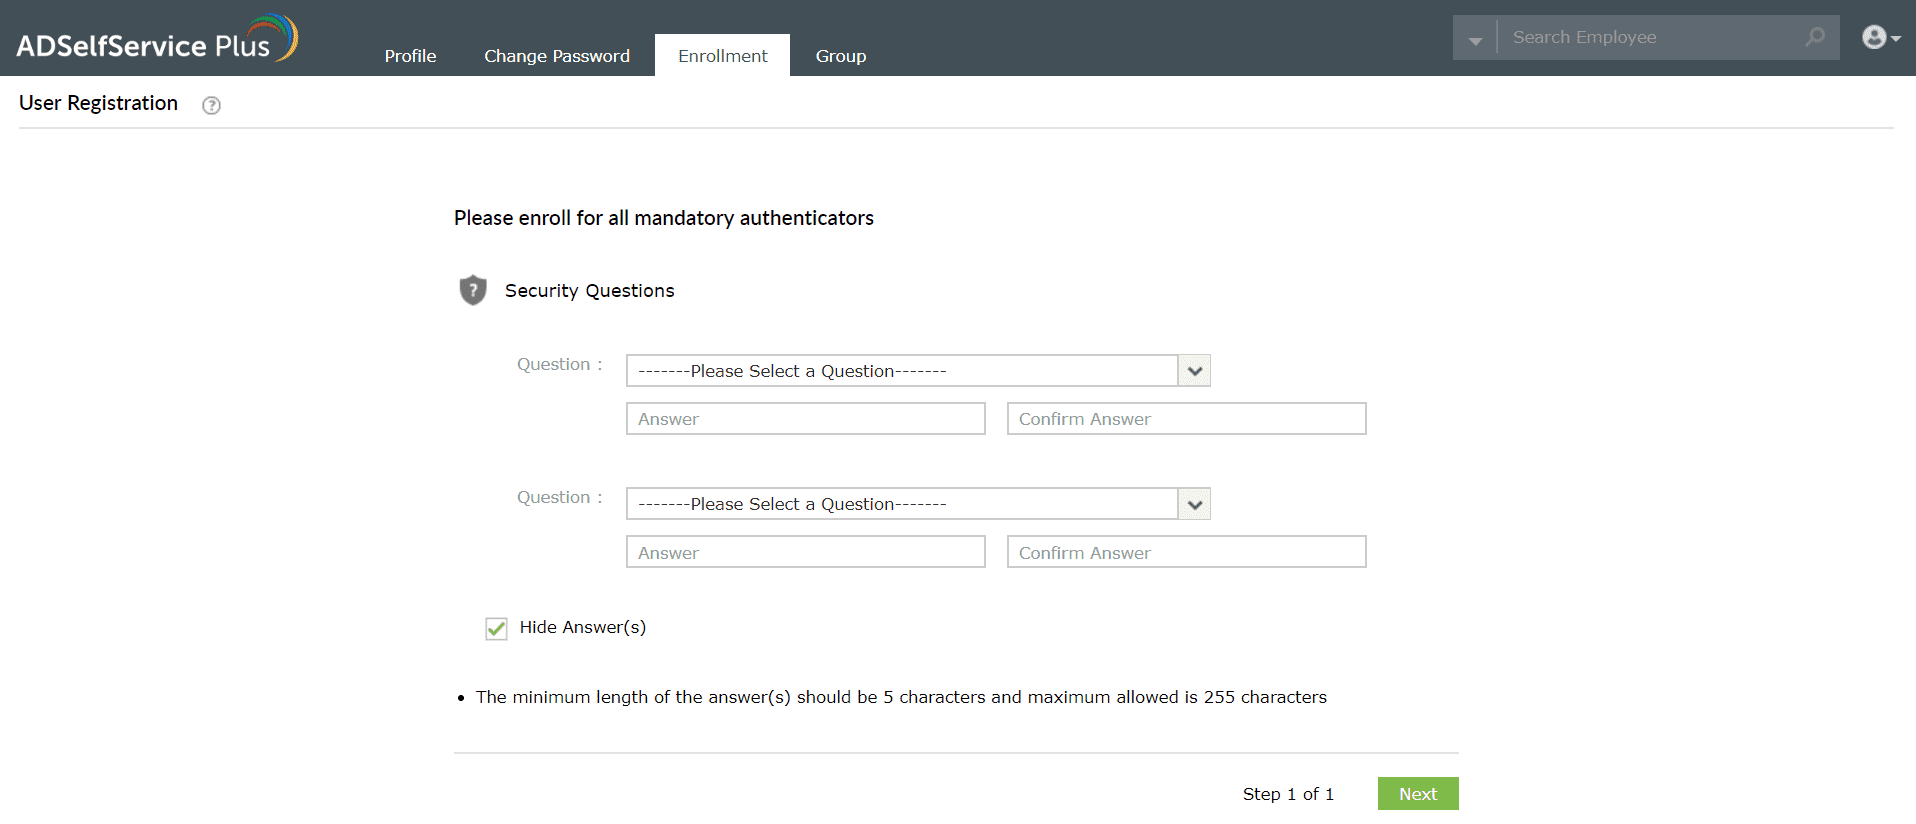
- In the ADSelfService Plus’ user portal, go to Enrollment tab → Security Questions.
- Any of these three windows will open.
- Mandatory security questions: Your administrator would have already configured the security questions. All you have to do is provide appropriate answers.
- Custom security questions: Configure your own security questions and provide appropriate answers.
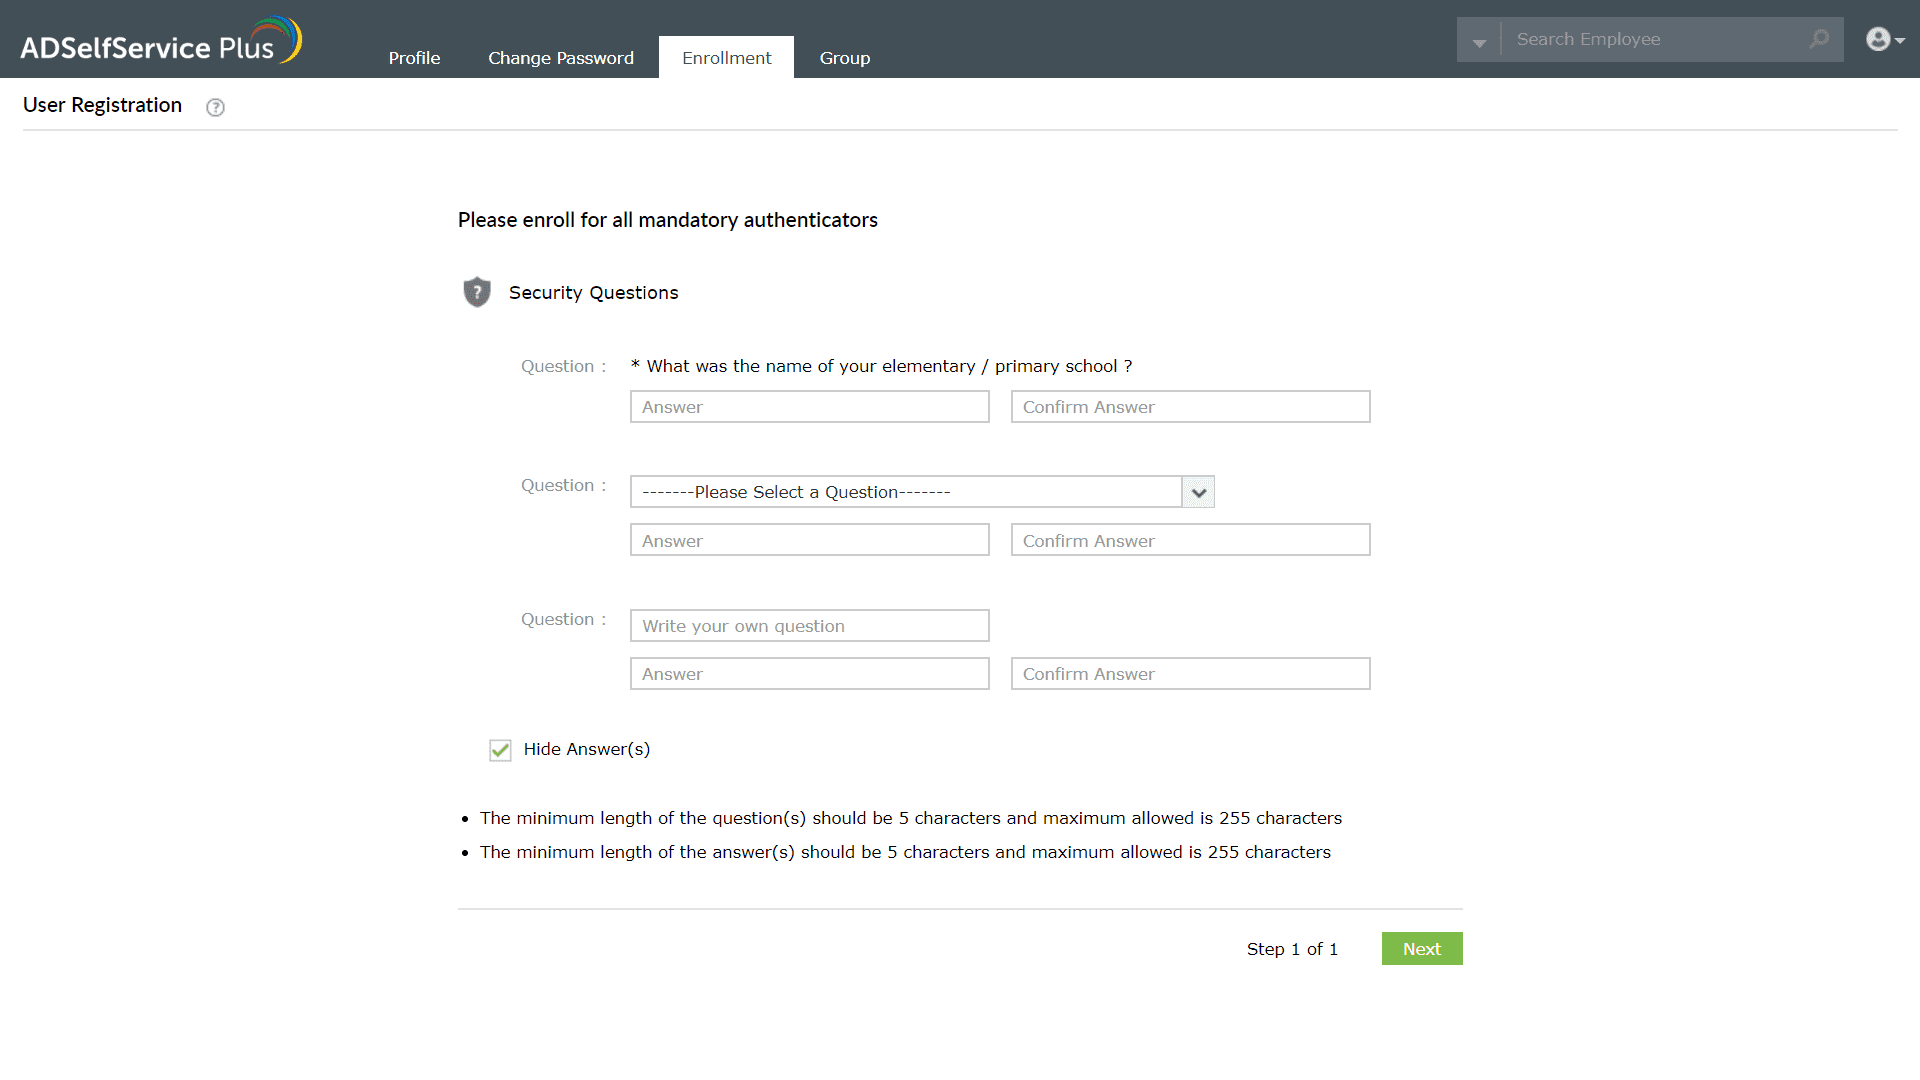
- Select a question from the list: A set of security questions defined by your administrator will be displayed. You choose the questions using which you wish to be authenticated and provide appropriate answers.
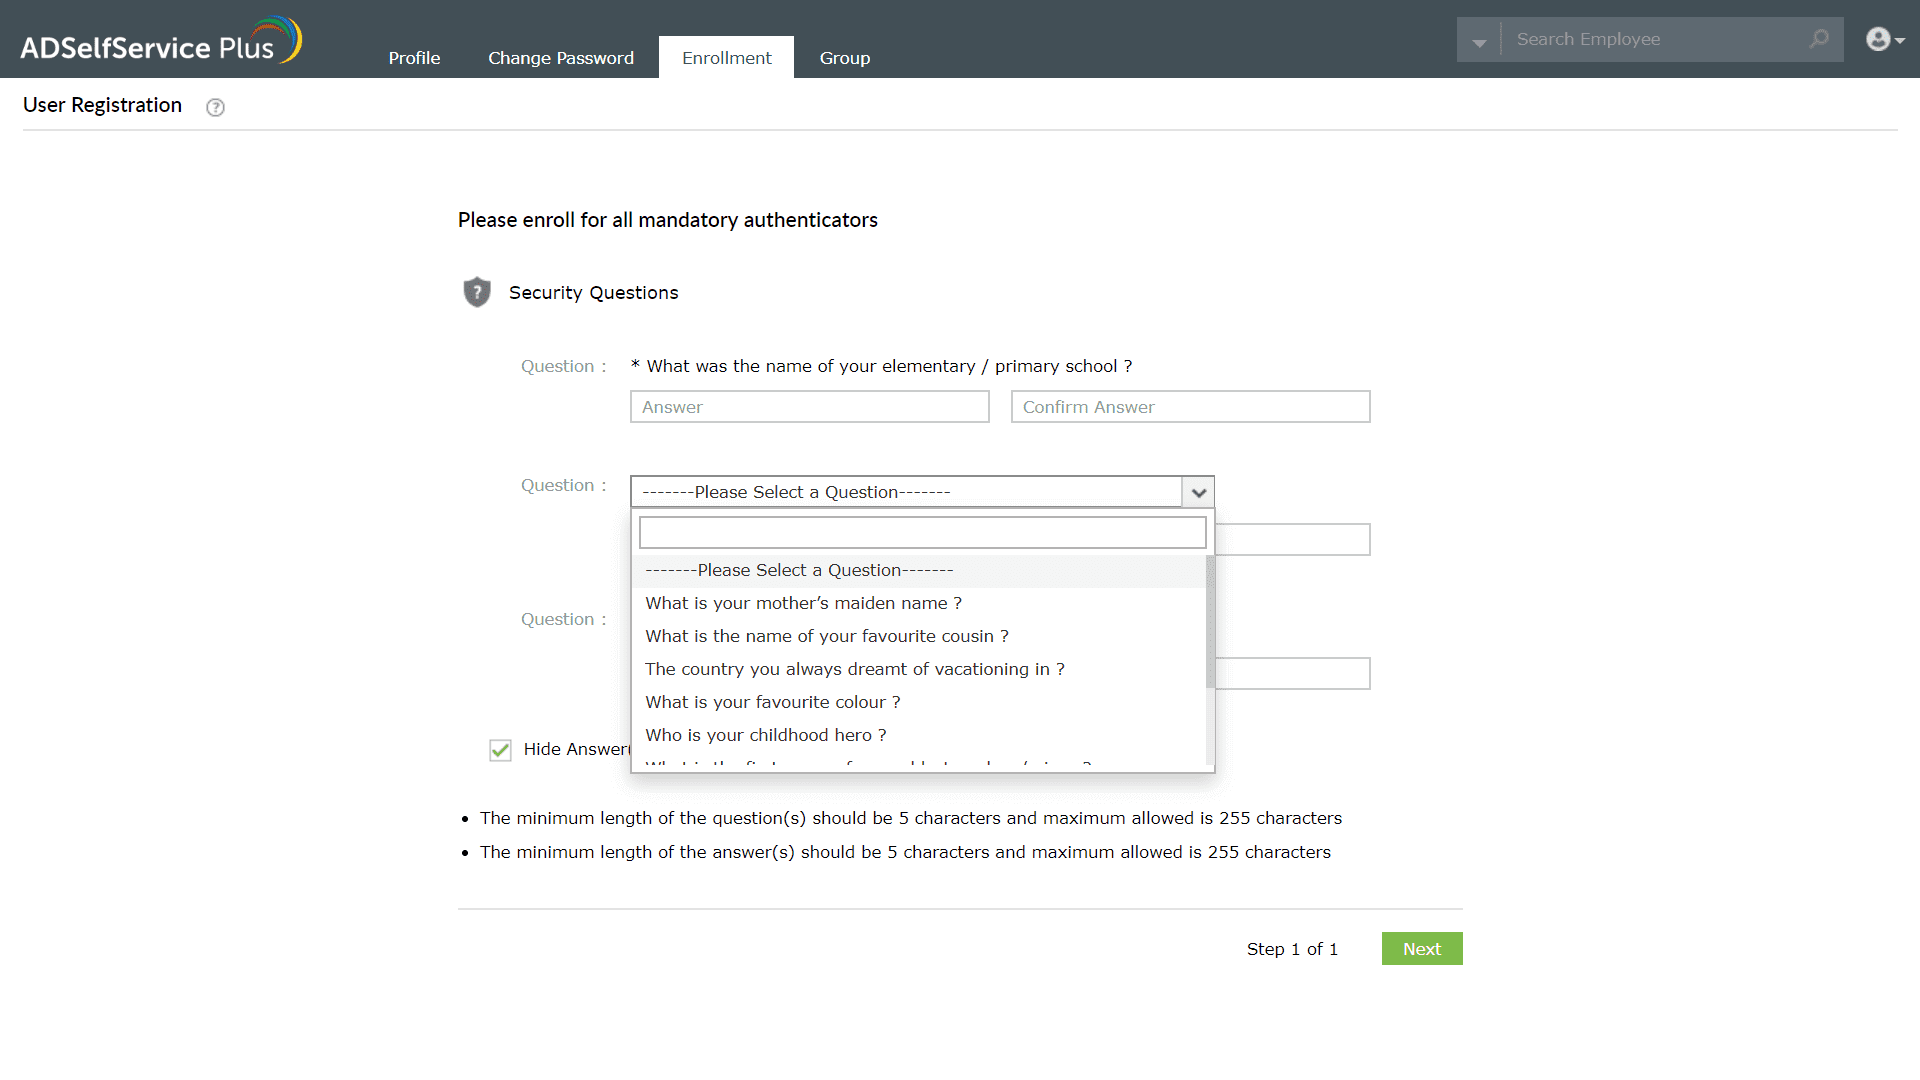
- Click Next.
Enrollment using email address
Get verification code via email ID
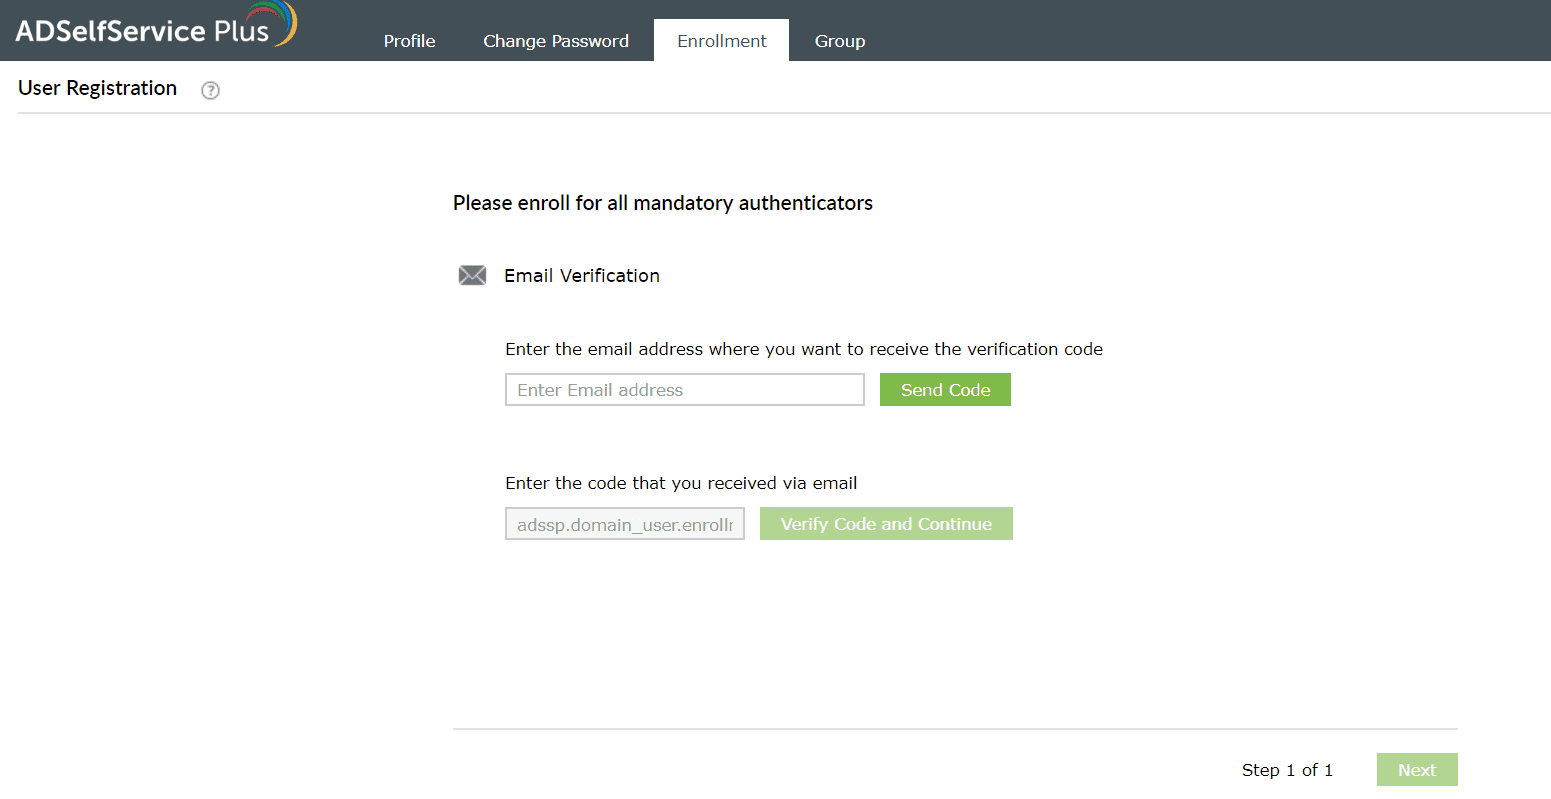
- In the ADSelfService Plus’ user portal, go to the Enrollment tab → Email verification
- Enter your email ID.
- Verify the entered email ID by entering the verification code sent to your mail.
- Click Next.
Enrollment using Mobile numbers
Get verification code via mobile number
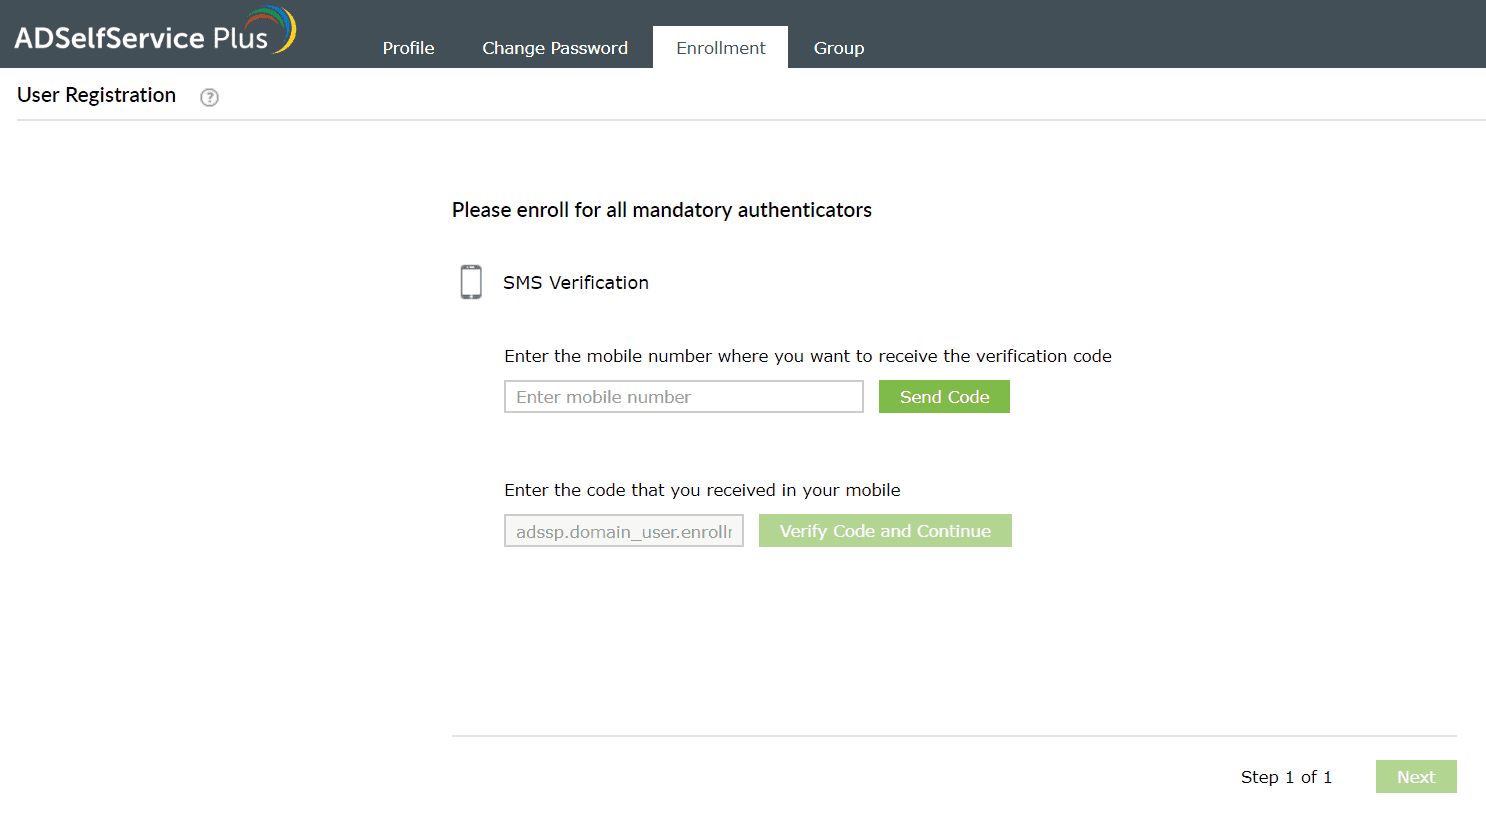
- In the ADSelfService Plus’ user portal, go to Enrollment tab → Mobile Verification
- Enter your mobile number.
- Verify the entered mobile number by entering the verification code sent to your device.
- Click Next.
Enrollment using Google Authenticator
Prerequisite:
- Download Google Authenticator app in your mobile device from the Play Store or the App Store.
Enrollment steps:
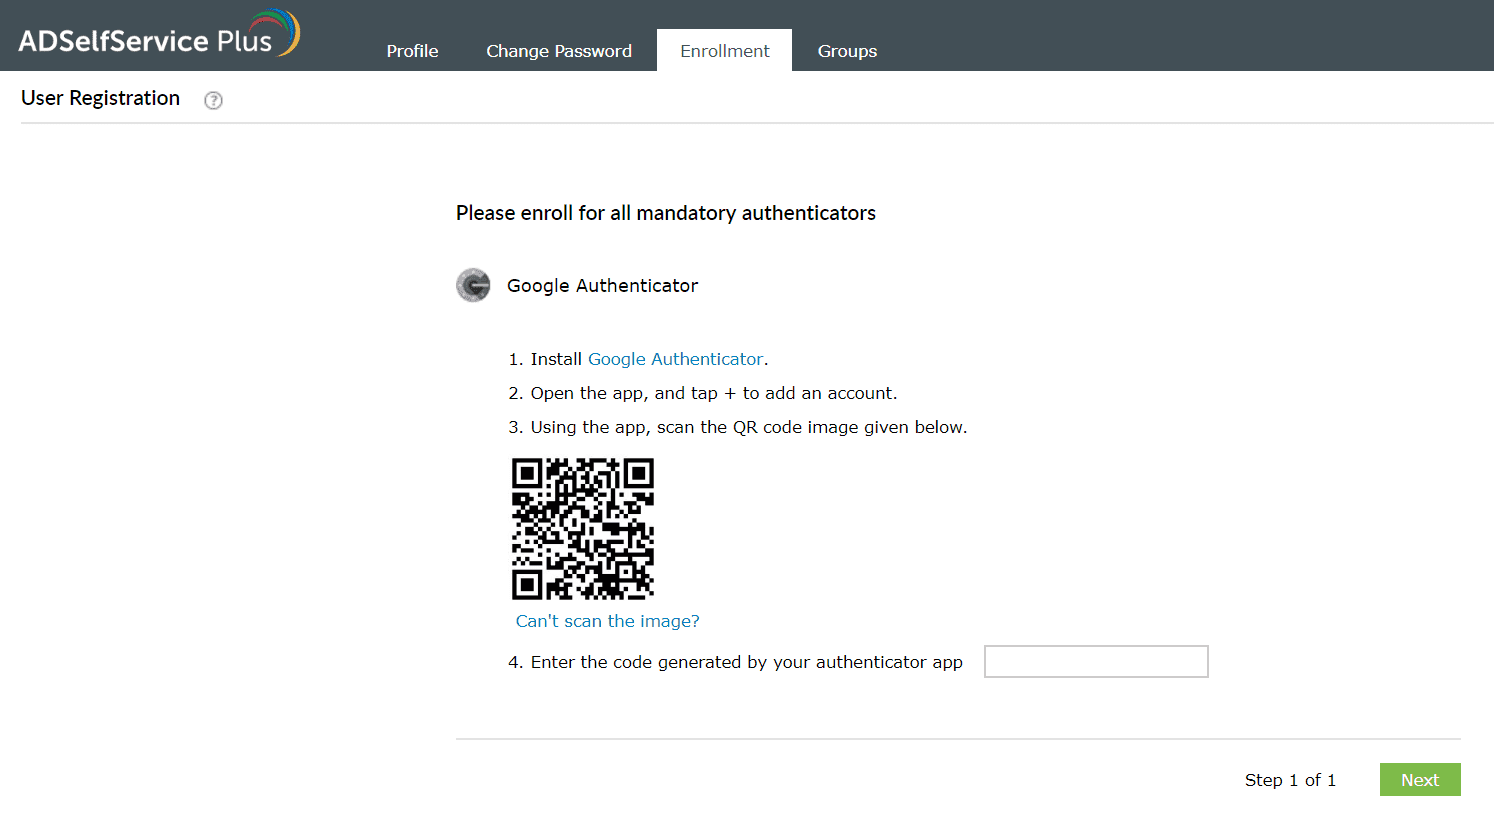
- Log into the ADSelfService Plus user portal and go to Enrollment > Google Authenticator. A barcode will be displayed.
- Open the Google Authenticator app on your smartphone.
- Select Scan QR code and scan the displayed QR code. Your account information will be automatically updated in Google Authenticator.
- If you're unable to scan the QR code, click the Can't scan it? link. A set of numbers will be displayed along with the username to be entered into Google Authenticator.
- On the Google Authenticator app on your mobile, select Manual entry > Enter the numbers displayed in the app.
- Enter the Account name in the format displayed in your ADSelfService portal and type the Secret Key (the set of numbers) displayed in ADSelfService Plus.
- A one-time-passcode will be generated in the app. Type that value in the Enter the code generated by your authenticator app field.
- Click Next.
Enrollment using Microsoft Authenticator
Prerequisite:
- Download the Microsoft Authenticator app to your mobile device from the Google Play Store or the Apple App Store.
Enrollment steps:
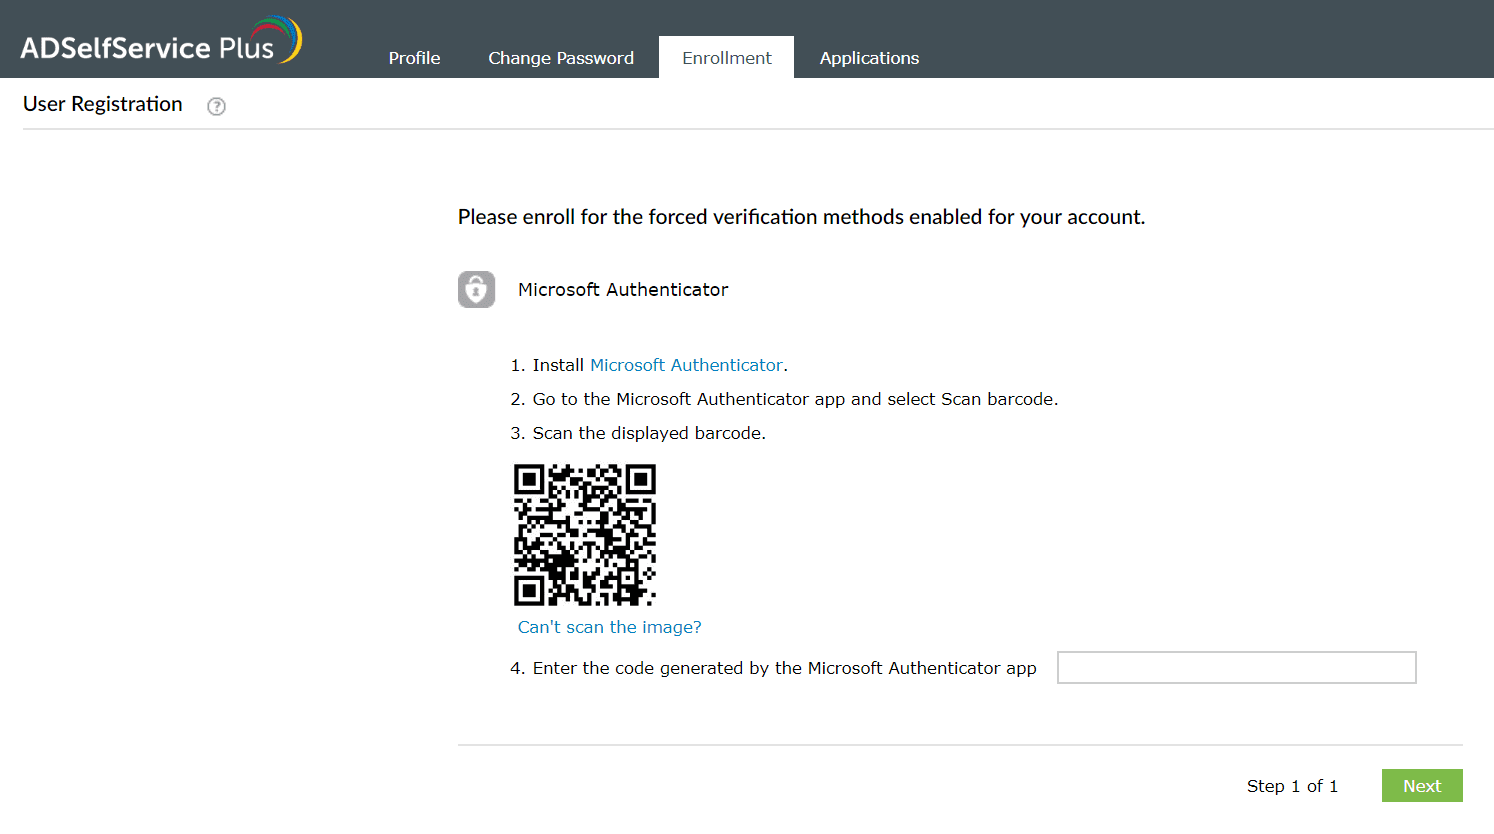
- Log into the ADSelfService Plus user portal and go to Enrollment > Microsoft Authenticator. A QR code will be displayed.
- Open the Microsoft Authenticator app on your smartphone.
- Select Scan QR code and scan the displayed QR code. Your account information will be automatically updated in Microsoft Authenticator.
- If you're unable to scan the QR code, click the Can't scan it? link. A set of numbers will be displayed along with the username to be entered into Microsoft Authenticator.
- On the Microsoft Authenticator app on your mobile, select Add account > Other (Google, Facebook, etc.) > OR ENTER CODE MANUALLY.
- Enter the Account name in the format displayed in your ADSelfService portal and type the Secret Key (the set of numbers) displayed in ADSelfService Plus.
- A one-time-passcode will be generated in the app. Type that value in the Enter the code generated by your authenticator app field.
Enrollment using Azure AD MFA
To enable Azure AD MFA, enrollment is not required from the ADSelfService Plus portal. You must already be enrolled for authentication methods configured by your administrator in the Azure AD user portal. Contact your administrator if not.
Enrollment using Yubikey Authenticator
Prerequisite:
- Enrolling through a workstation: Plug in the Yubikey device to your workstation. Place the cursor in the field below and press/hold the button on the plugged-in Yubikey device depending on the slot configured. The code is automatically updated.
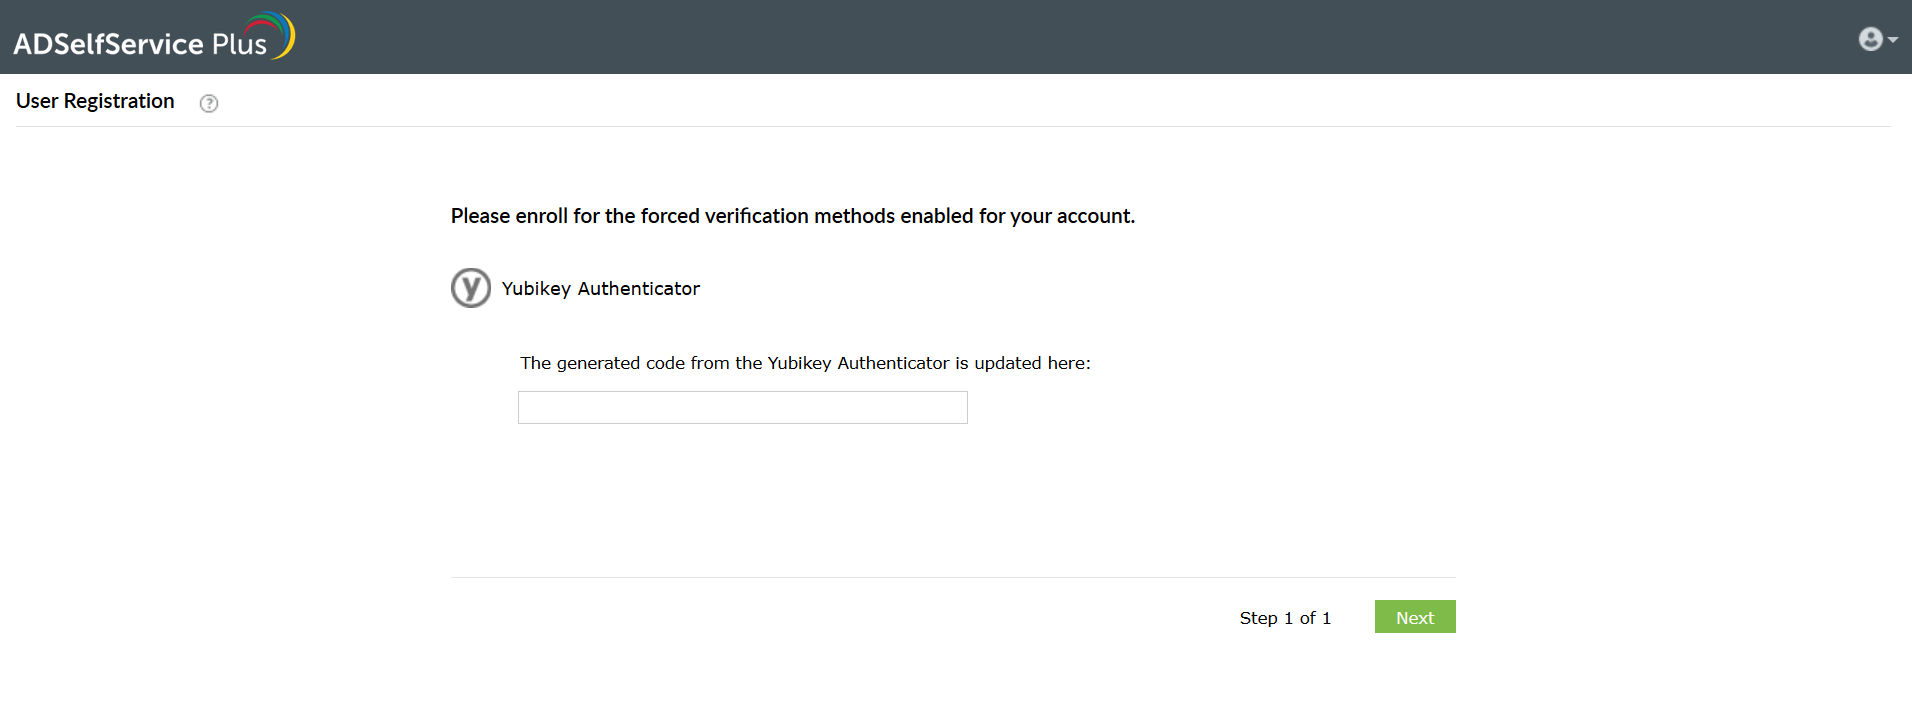
- Enrolling through a mobile device: If you are using an NFC-enabled mobile device, simply tap the Yubikey device against your mobile. Copy the displayed passcode and paste it in the field below.
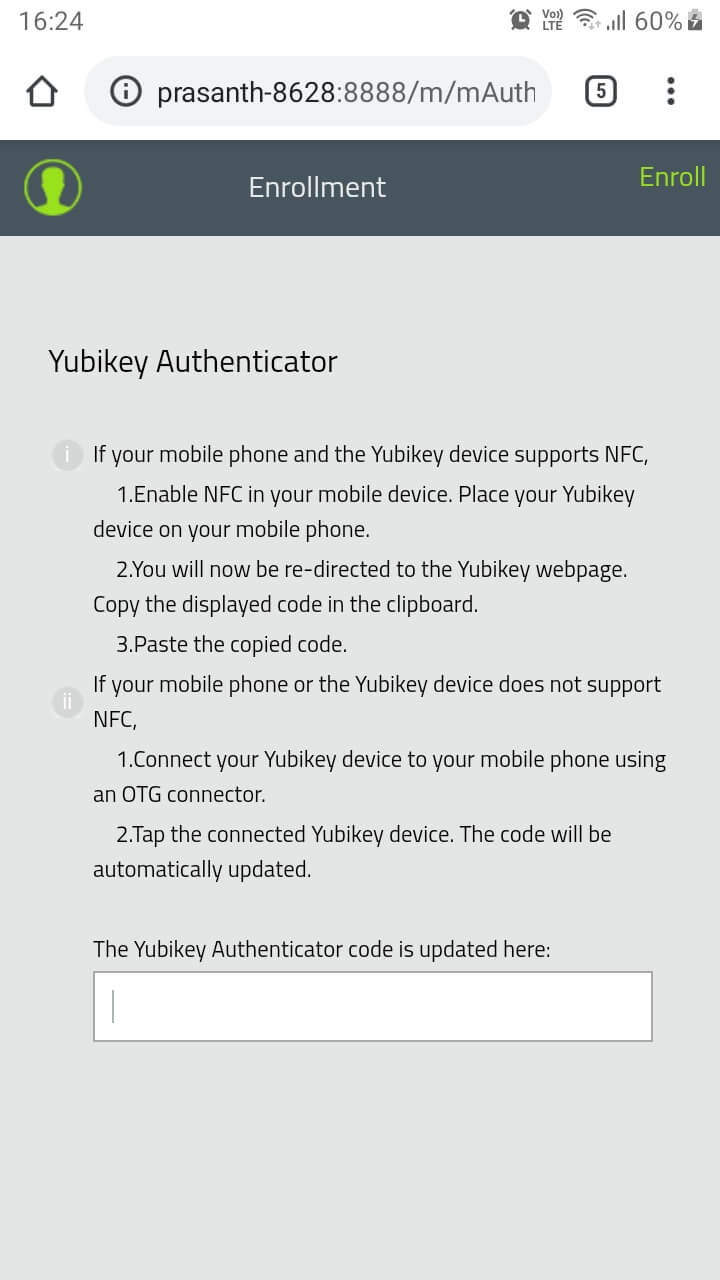
- Click Next.
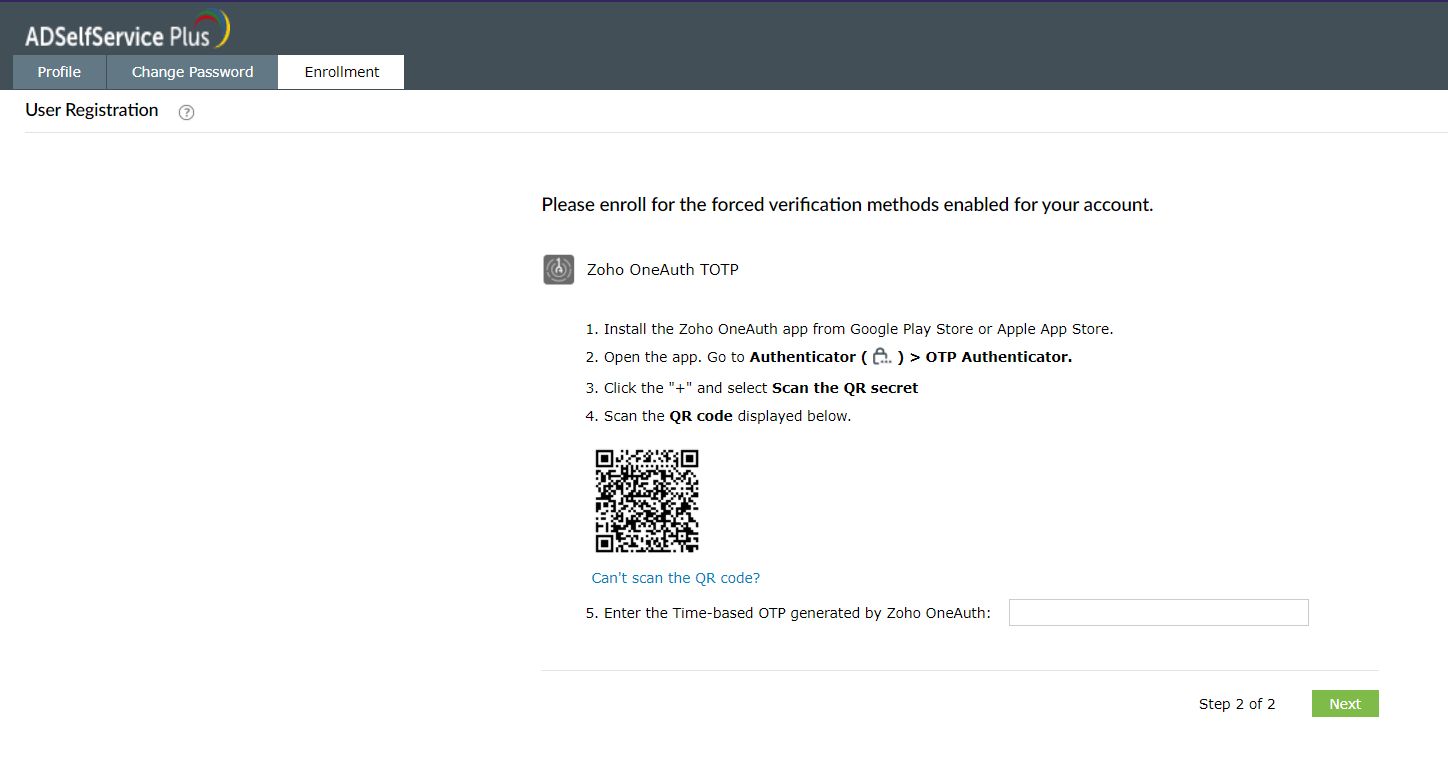
Enrollment using Zoho OneAuth
Prerequisite:
Install Zoho OneAuth on your mobile device. You can download it from the Google Play Store or the Apple App Store.
Enrollment steps:
- In the ADSelfService Plus' user portal, go to Enrollment > Zoho OneAuth TOTP. A QR code will be displayed.
- Open the Zoho OneAuth app on your phone. Go to Authenticator (
 ) > OTP Authenticator.
- Click the +, select Scan the QR secret, and scan the displayed QR code. Your account information will be automatically updated in the app.
- If this method fails, click Can't scan the QR code? link. A secret key will be displayed.
- Open the Zoho OneAuth app on your phone. Select Enter secret manually.
- Enter the Account name in the format displayed in your ADSelfService portal and type the Secret Key (the set of numbers) displayed in ADSelfService Plus.
- A one-time-passcode is generated in the app. Type that value in the Enter the TOTP field in the ADSelfService Plus user registration screen.
- Click Next.
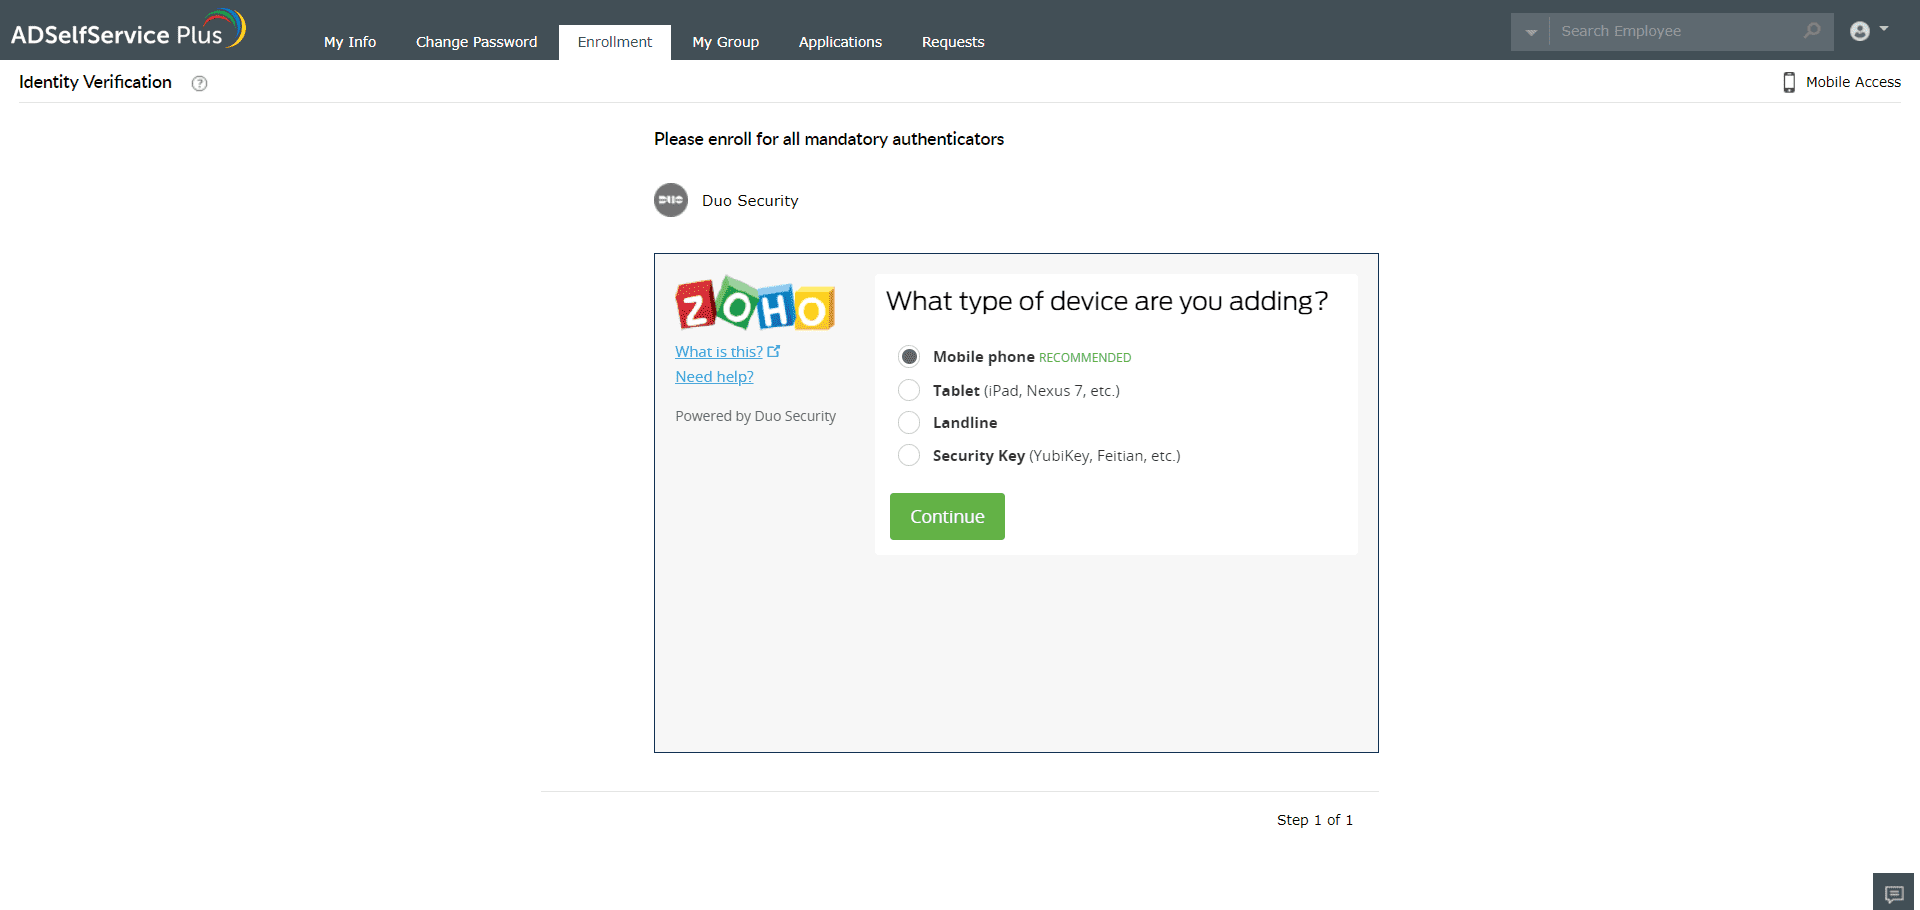
Enrollment using DUO Security
- In the ADSelfService Plus’ user portal, go to Enrollment tab → DUO Security.
- Follow the steps given in the webpage.
- Click Next.
Enrollment using RSA SecurID
For RSA Authentication, enrollment is not required from ADSelfService Plus portal. Please contact your administrator for the RSA hardware token that is mapped to your account.
Enrollment using RADIUS Authentication
For RADIUS Authentication, enrollment is not required from ADSelfService Plus portal. Please contact your administrator for the RADIUS password that is mapped to your account.
Enrollment using SAML Authentication
For SAML Authentication, enrollment is not required from ADSelfService Plus portal. Please contact your administrator to receive the identity provider credentials that is mapped to your account.
Enrollment using AD Security Questions
For utilizing AD Security Questions method of authentication, you are not required to enroll from ADSelfService Plus portal. If you are unsure about the answers for the displayed AD security questions, please contact your administrator.
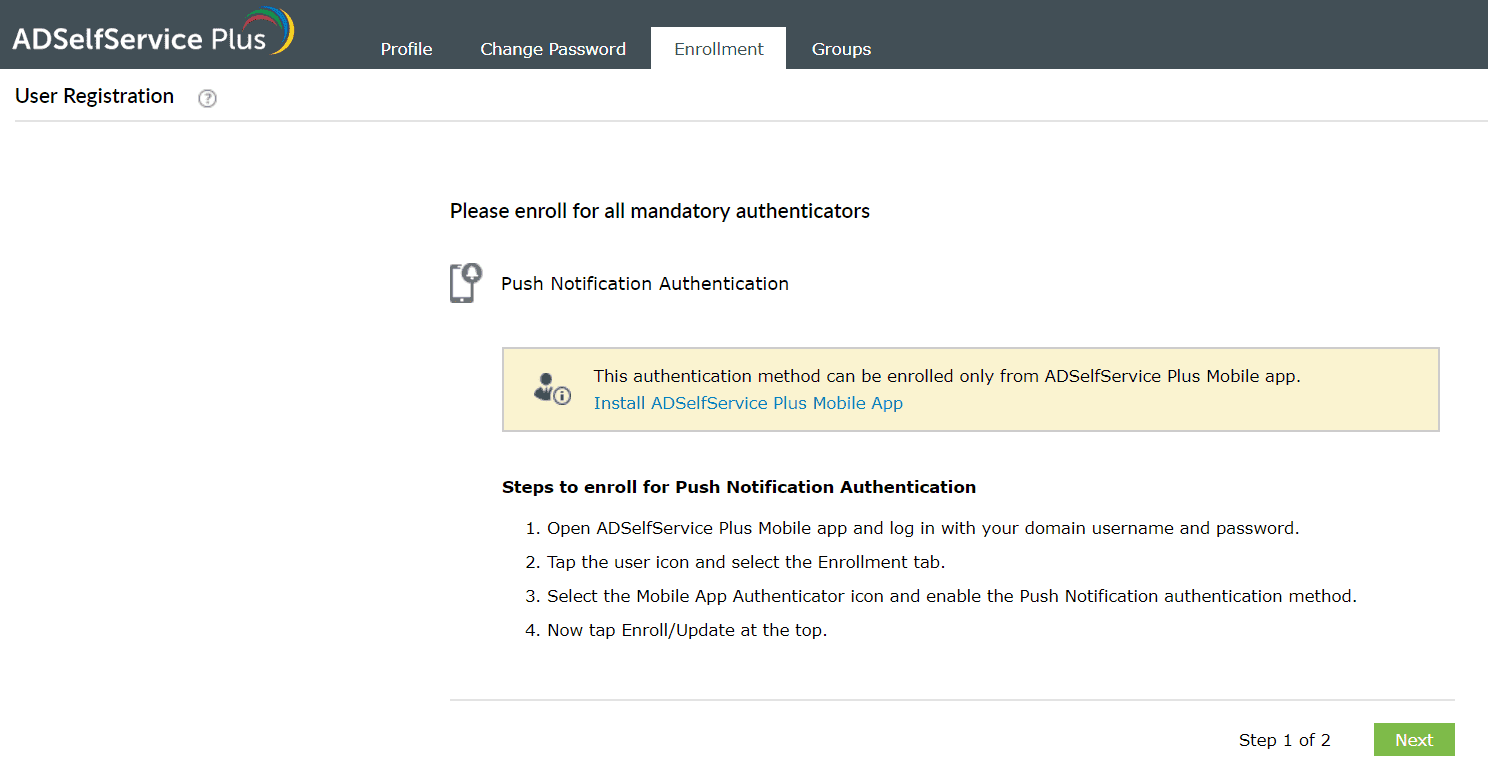
Enrollment using Push Notification Authentication
- Log in to the ADSelfService Plus mobile app > click Enrollment → Push Authentication.
- Follow the steps displayed in the webpage.
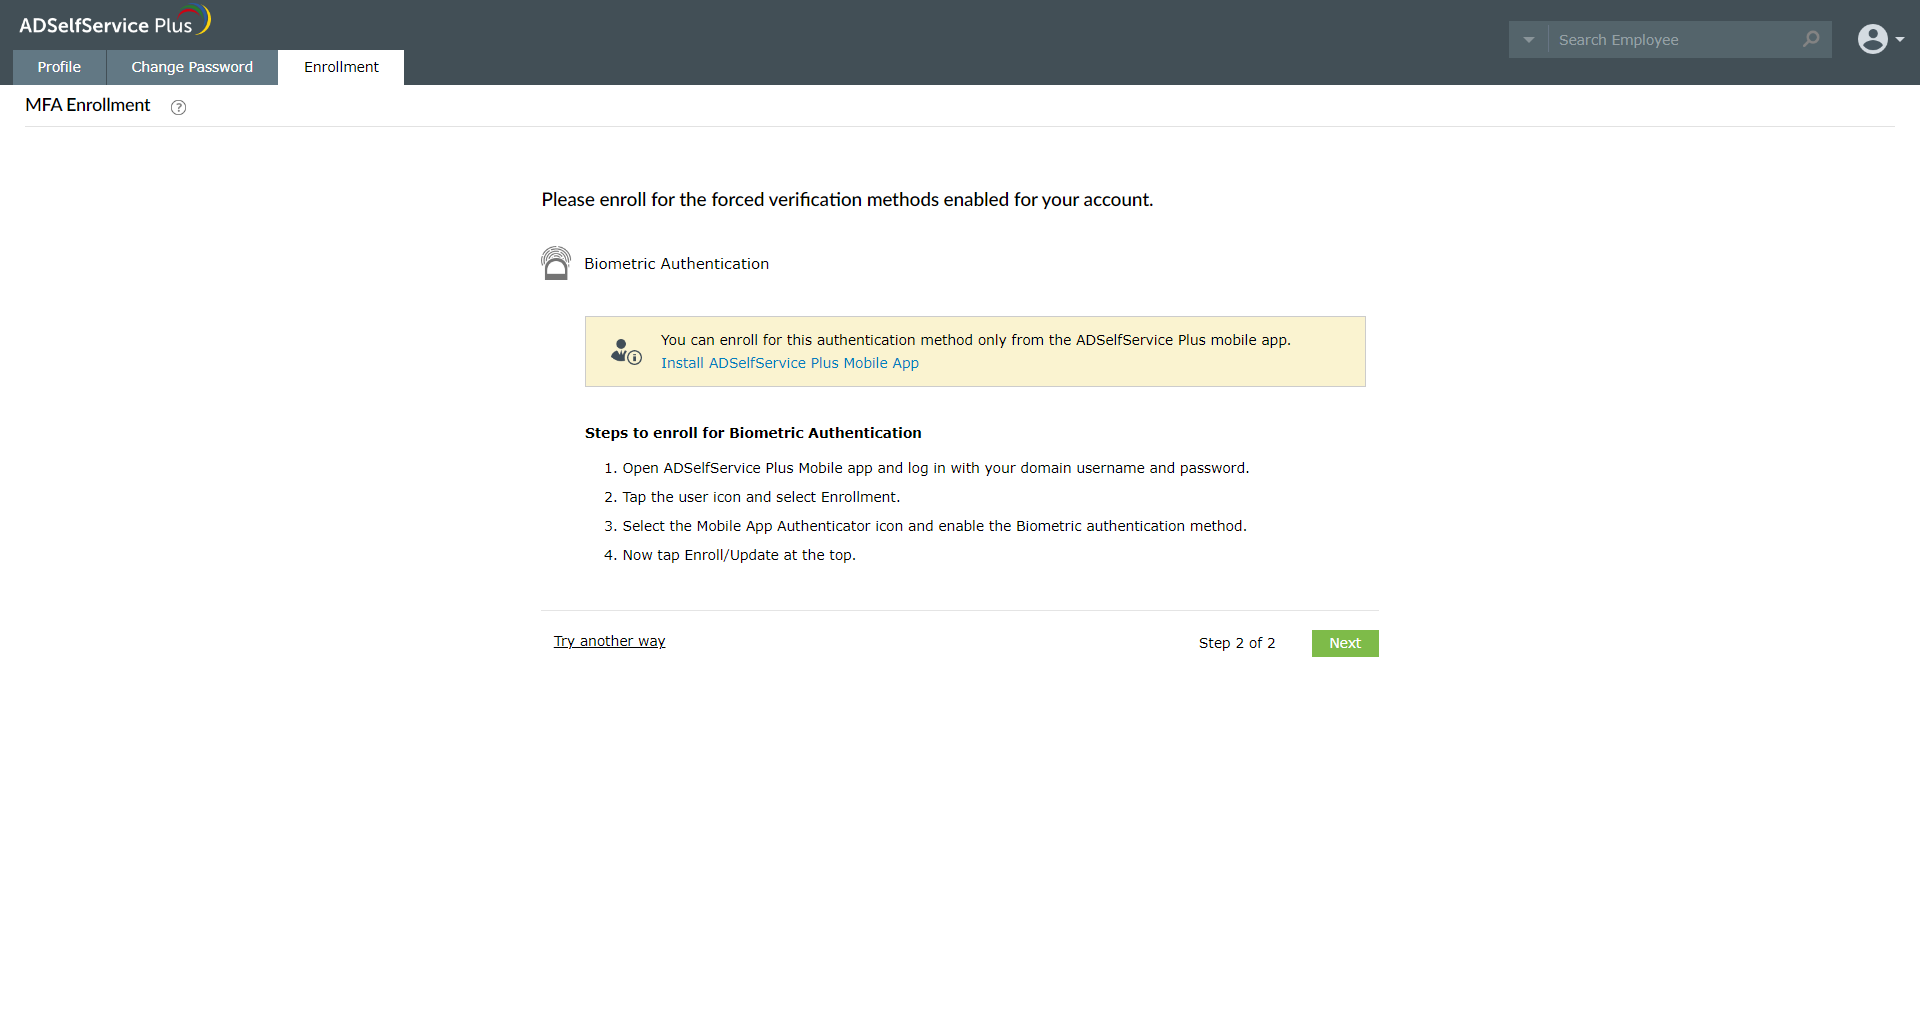
Enrollment using Biometric Authentication
- Log in to the ADSelfService Plus mobile app > click Enrollment → Biometric Authentication.
- Follow the steps displayed in the webpage.
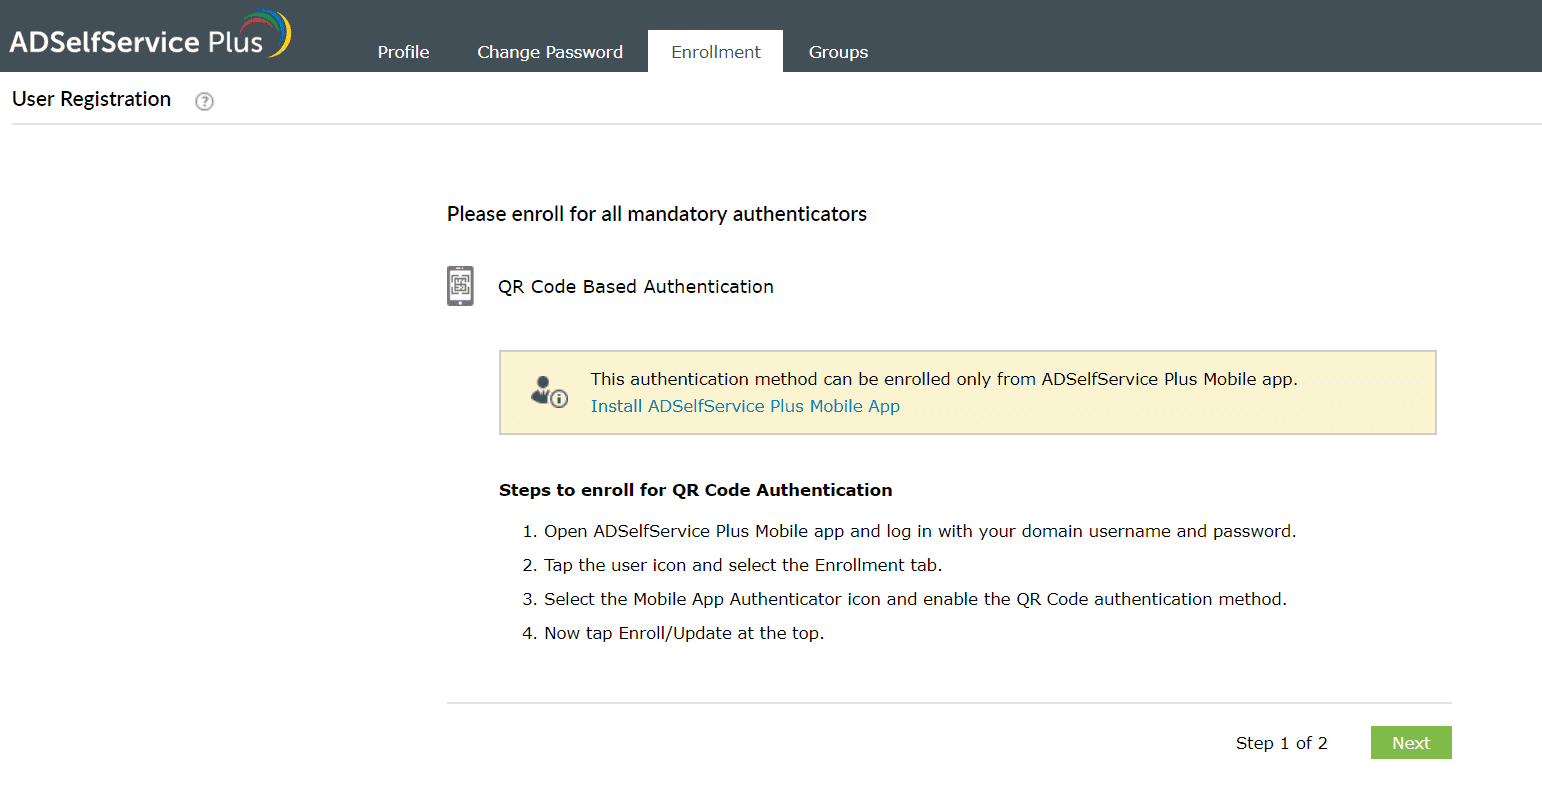
Enrollment using QR code Authentication
- Log in to the ADSelfService Plus mobile app > click Enrollment → QR code Authentication.
- Follow the steps displayed in the webpage.
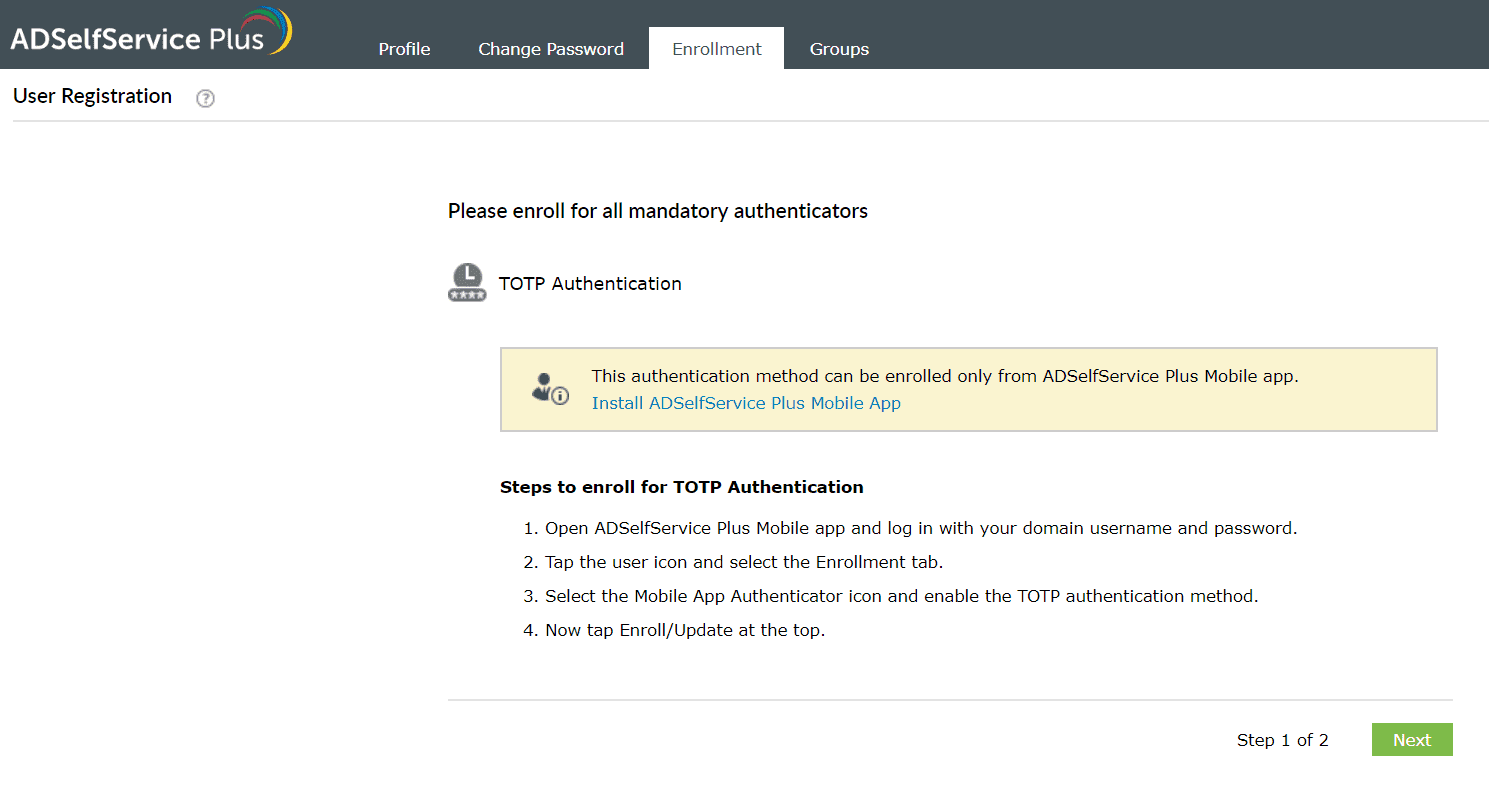
Enrollment using TOTP Authentication
- Log in to the ADSelfService Plus mobile app > click Enrollment → TOTP Authentication.
- Follow the steps displayed in the webpage.
Enrollment for FIDO2 passkeys
Prerequisite:
- You must have the latest browsers on your devices to use this authenticator. Contact your administrator if you are not sure.
- If you are facing browser-support issues, please contact your administrator.
Enrollment steps:
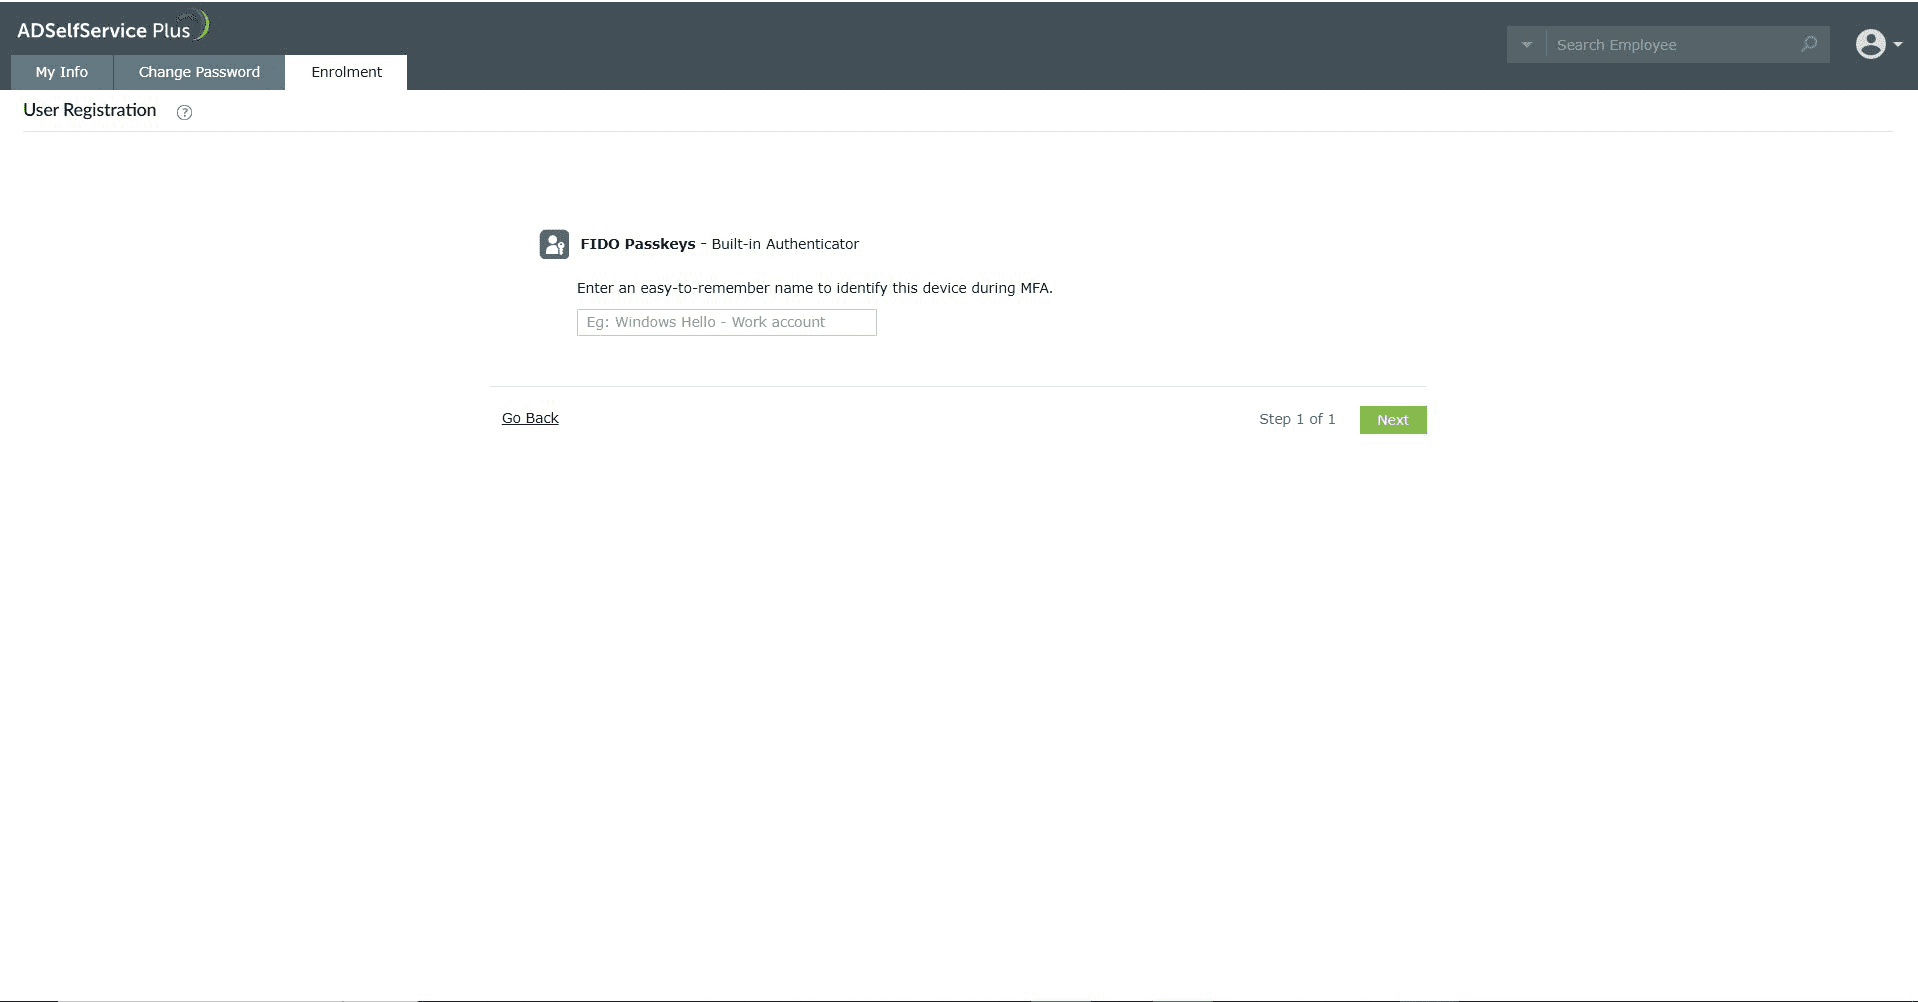
- Log into the ADSelfService Plus user portal and click Enrollment > FIDO2 Passkeys.
- Choose the type of passkey you want to enroll for.
- Suppose you are logged into ADSelfService Plus on a Windows machine and are attempting enrollment from a browser. If you choose Platform Authentication, the Windows machine will verify your identity using Windows Hello.
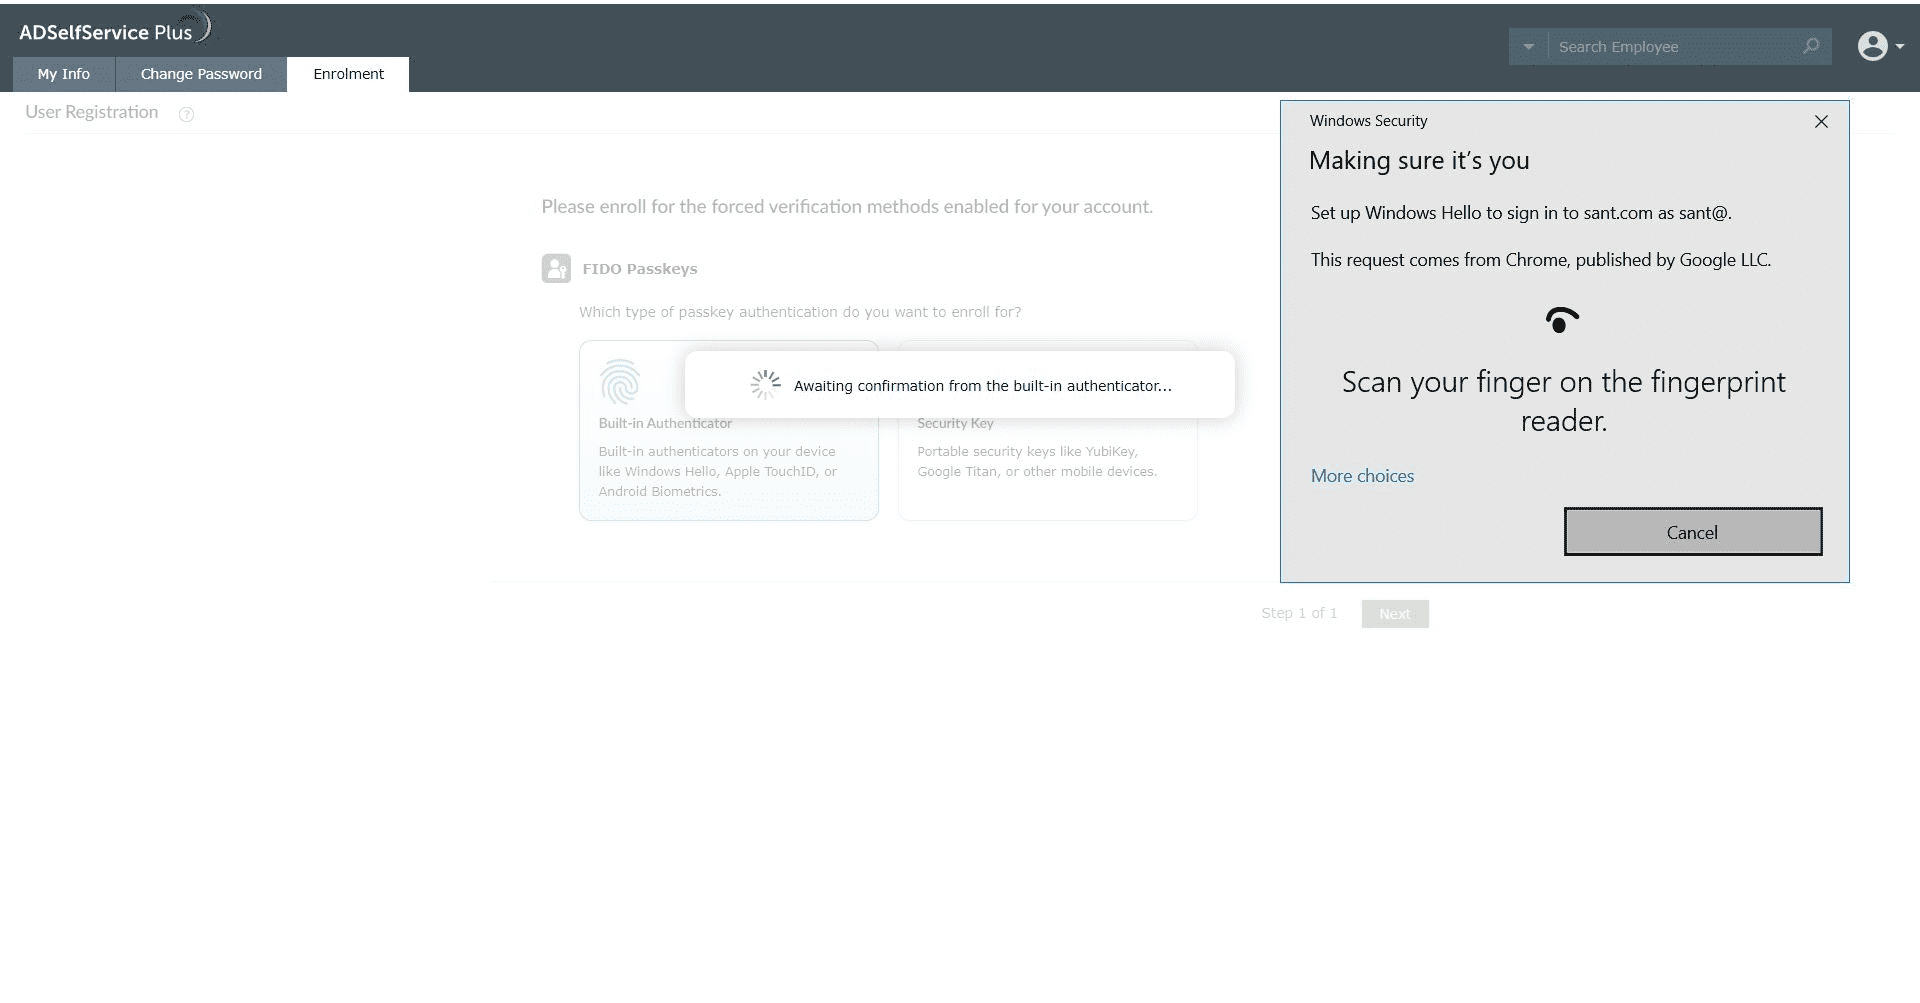
- Once verified, you can enroll the Windows Hello authenticator on the machine as a FIDO2 passkey for MFA.
- If you choose Security Keys, the authentication mechanism on the Security Key will first verify your identity (for instance, if you are enrolling a YubiKey, you will be prompted to enter the PIN or touch the sensor).
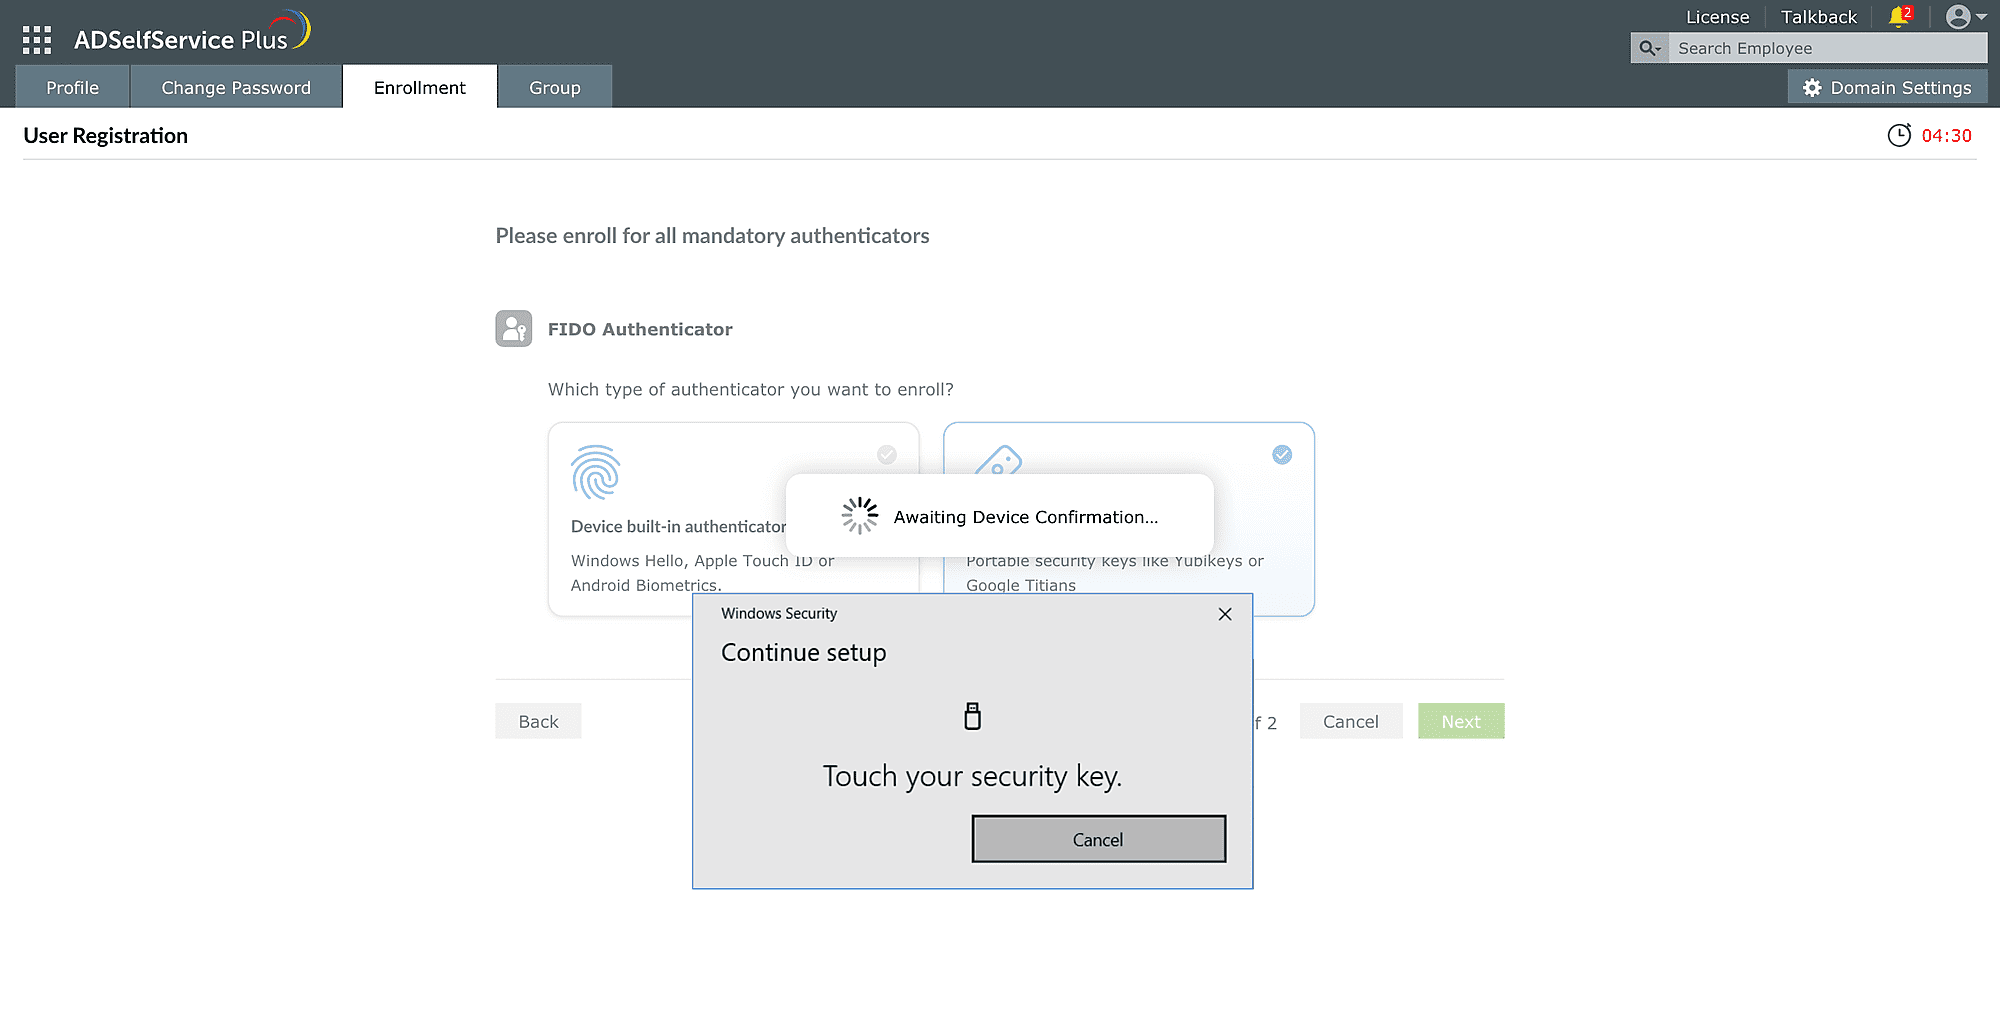
- If you are enrolling a smartphone as a Security Key, you will need to use the QR code displayed in the ADSelfService Plus portal for enrollment.
Note: If you are accessing the ADSelfService Plus end-user portal on a smartphone that has already been registered as a Security Key (roaming authenticator), you need to select 'Security Key' as the passkey type to authenticate and confirm your identity on the same smartphone.
- Once verified, you will be able to enroll the security key as a FIDO2 Passkey for MFA.
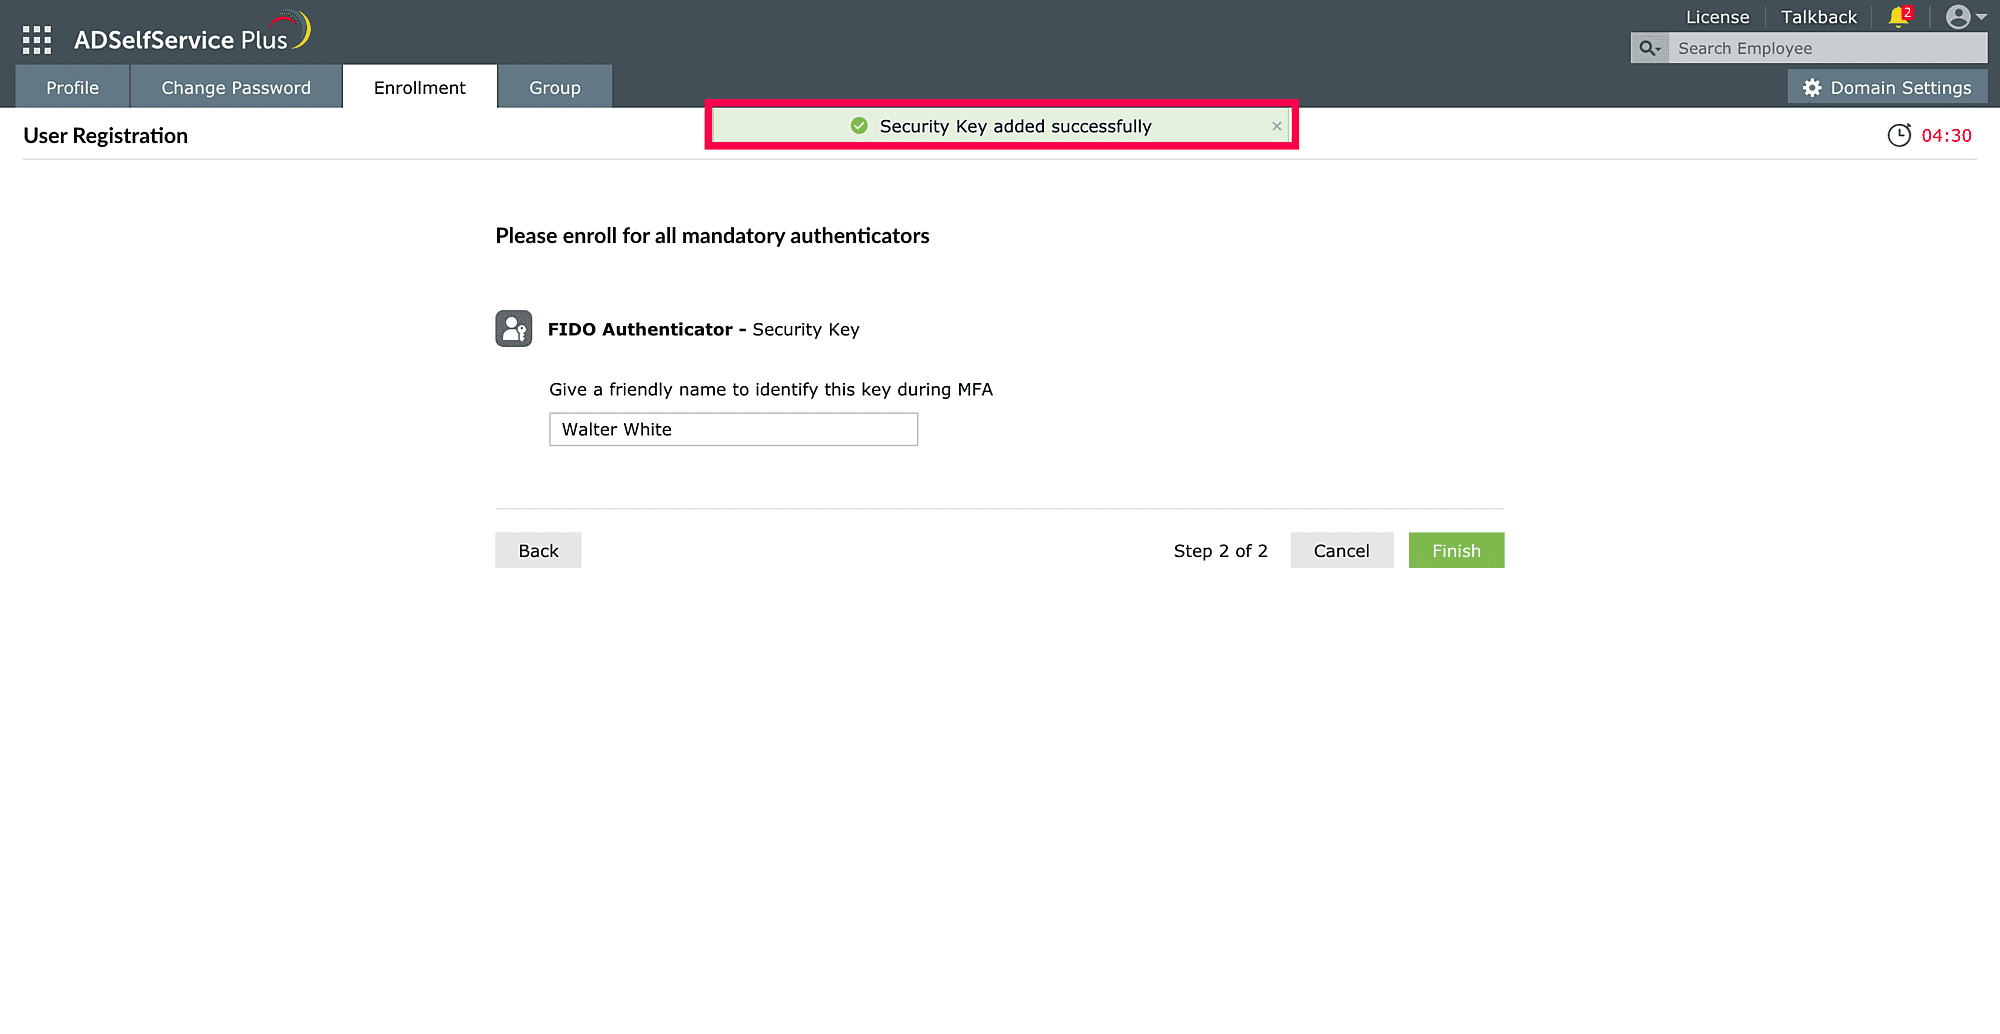
- Follow the instructions on the webpage and click Finish to complete enrollment.
Smart Card Authentication
Smart Card Authentication works by presenting your digital identity certificate to protected endpoints. This can be done by inserting a USB smart card device, such as a PIVKey, HID Crescendo Card, YubiKey or similar Personal Identity Verification (PIV) card, or using a certificate stored in your machine's personal key store. If configured, you’ll need to enter your smart card PIN, which will be verified against your enrollment information to complete authentication.
Enrollment is not required from the ADSelfService Plus user portal; your administrator would have already enrolled you for Smart Card Authentication and provided you with your USB device, or installed your digital certificate in the personal key store on your machine.
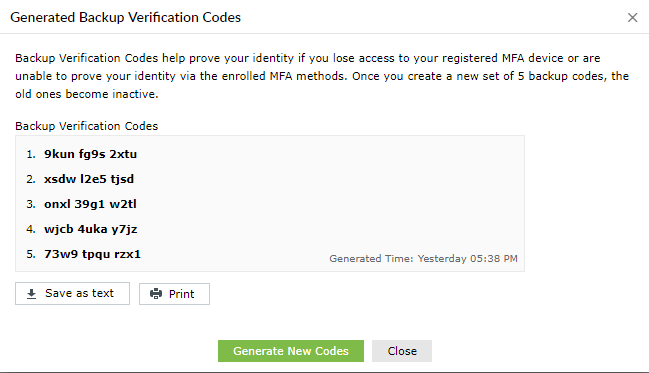
Backup verification codes
The codes are a set of 12-character codes that you can generate and use to verify your identity. There are 5 backup codes in a set. You can use these codes if you are unable to use your enrolled MFA methods for authentication or you don't have access to you MFAdevice. Each code can be used only once for verifying your identity during machine, VPN, and ADSelfService Plus logins or for performing any self-service actions.
Backup code generation:
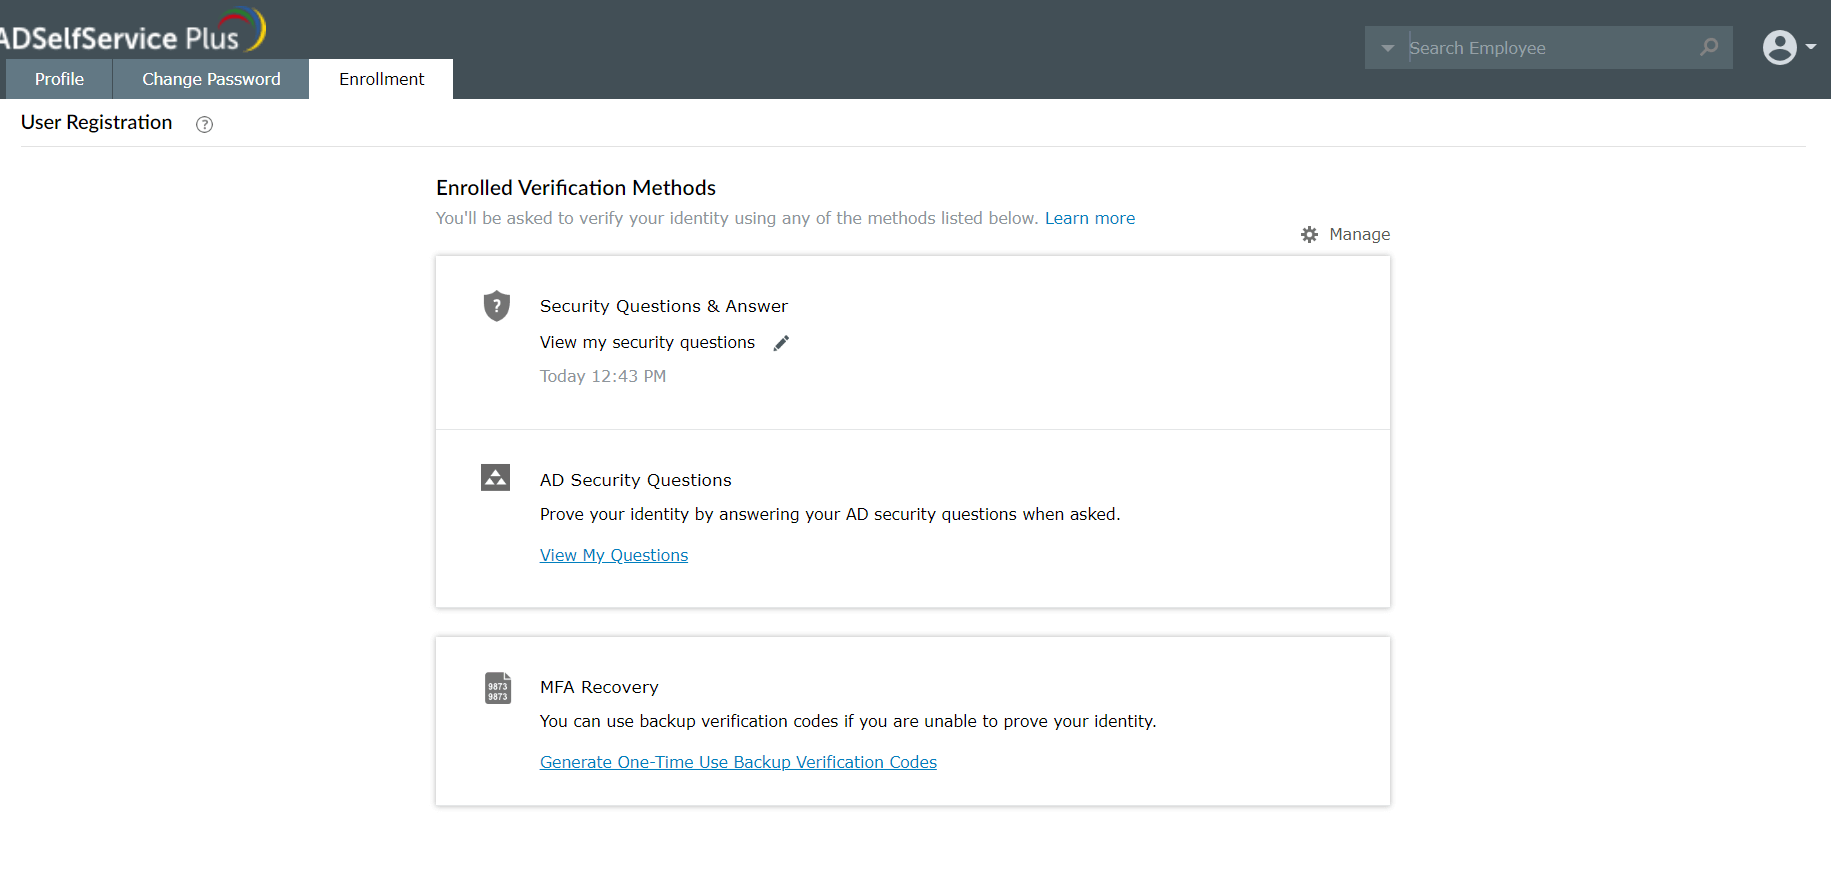
The MFA backup codes section can be accessed from:
- Enrollment tab: In the ADSelfService Plus user portal, go to Enrollment. Under MFA Recovery Mode, select Generate One-Time Use Backup Codes.
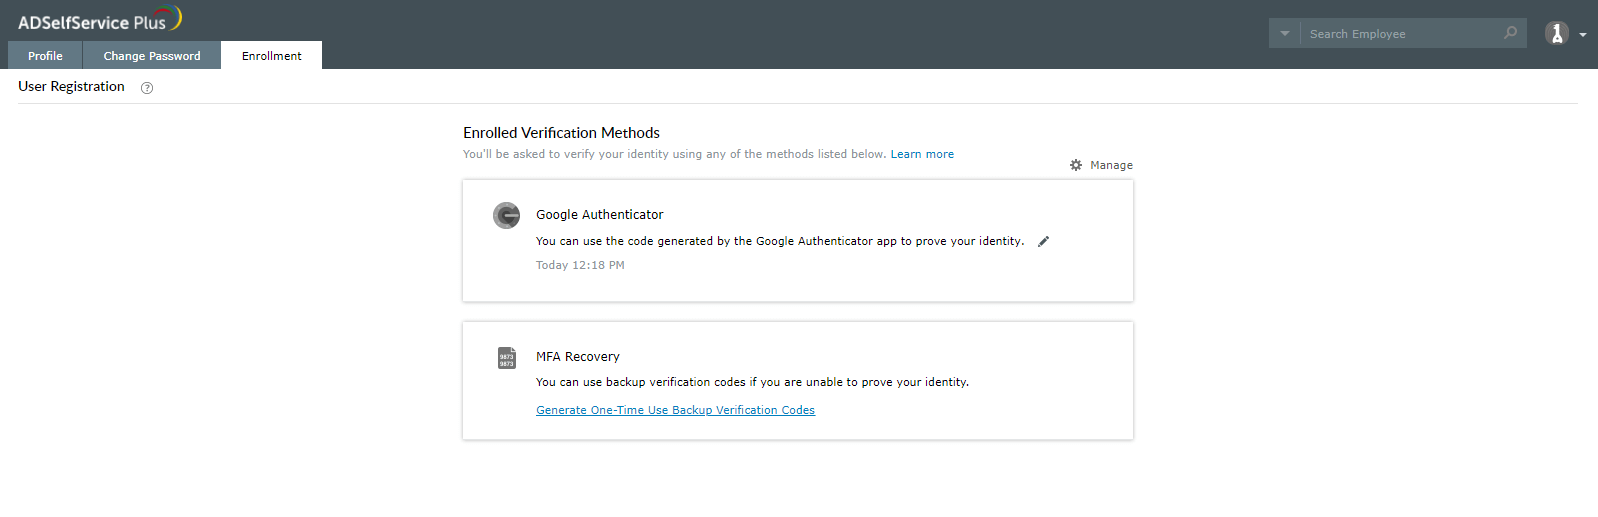
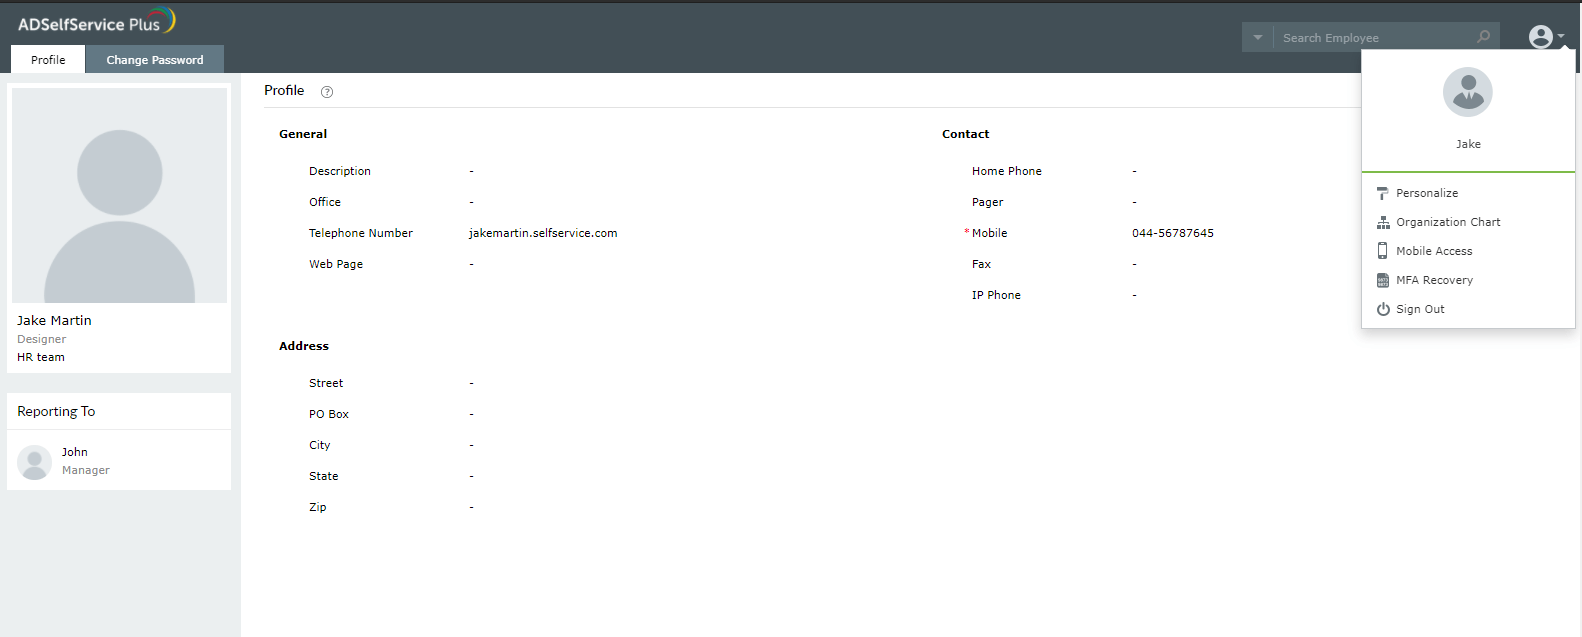
- Profile icon: If the Enrollment tab is not available, in the ADSelfService Plus user portal, click the profile icon and select MFA Recovery from the profile menu that appears.
- The Generated Backup Verification Codes section will appear. Here, five MFA backup verification codes will be displayed. If you require a new set of codes,click Generate New Codes. The previously displayed set of codes will be invalidated.
- Choose what to do with the generated codes:
- Save as Text: Download the codes as a text file.
- Send Email: Email the backup codes to a specific email address.
- Print: Print a hard copy of the codes.
- Click Close.
Offline MFA
Offline MFA ensures that your identity is authenticated and the access to your machine is secured even when the ADSelfService Plus server is unreachable. ADSelfService Plus supports offline MFA during local and remote Windows logins and User Account Control prompts. It uses the following authenticators:
- Google Authenticator
- Microsoft Authenticator
- Custom TOTP authenticator
- Zoho OneAuth TOTP
How do I enroll a particular machine for offline MFA?
Once you successfully complete MFA when connected to the ADSelfService Plus server, based on admin configuration, you will be prompted to enroll for any authenticators required for offline MFA. You will then either be automatically enrolled or prompted to enroll your machine for offline MFA as shown in this image:
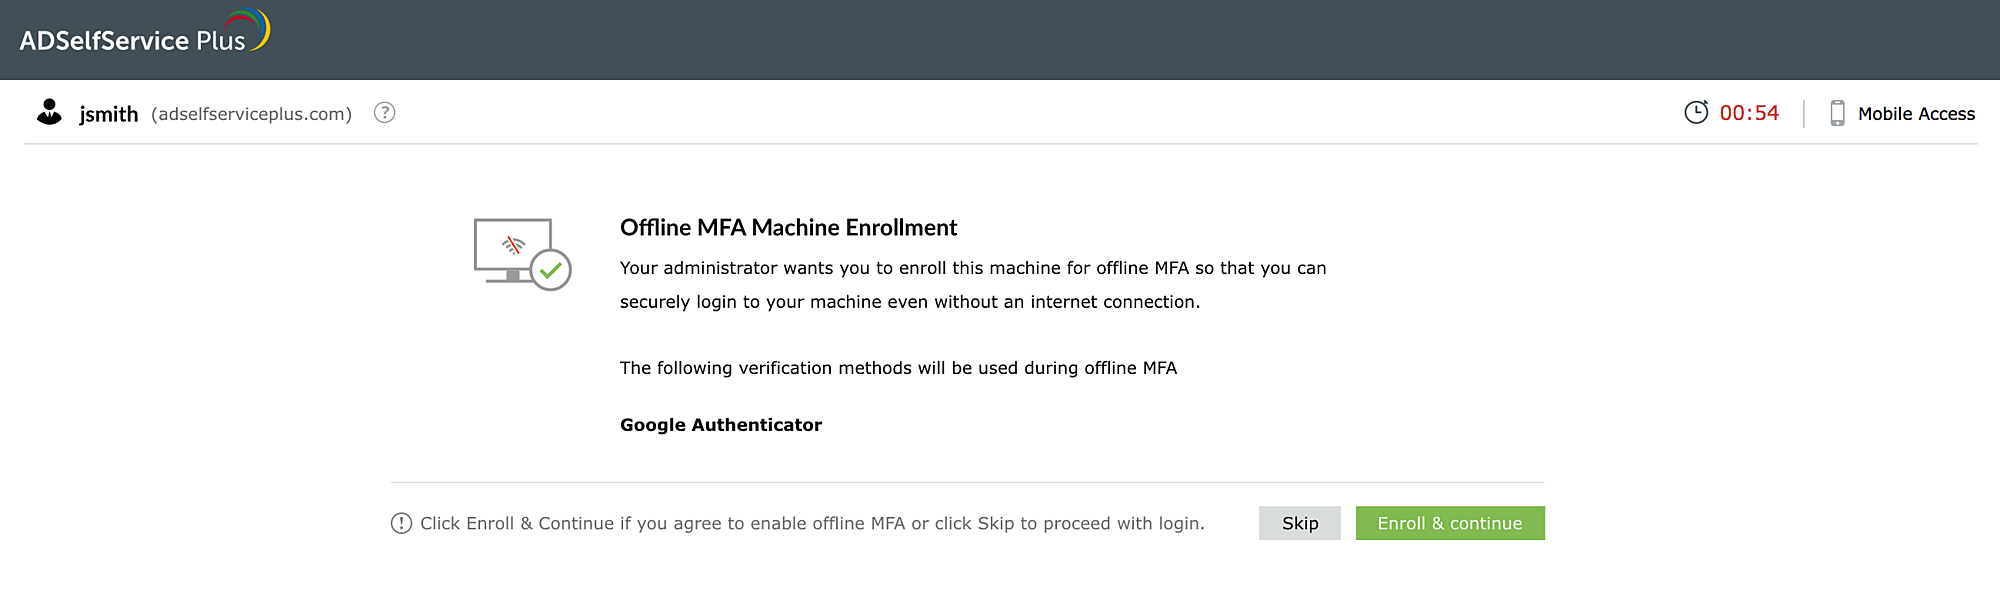
Click Enroll & Continue to enroll your machine for offline MFA and access your machine. Your machine is now successfully enrolled for offline MFA. The next time the ADSelfService Plus server is unreachable, you can verify your identity using offline MFA and continue using your machine.
How to disenroll from offline MFA?
If you do not want to continue using offline MFA in a machine, you can revoke the enrollment information. For this:
- Log in to the ADSelfService Plus user portal.
- Go to the Enrollment tab. Click on Manage.
- Go to the Offline MFA - Enrolled Machines tab. Here, click Disenroll for the machine you want to revoke your offline MFA enrollment from.
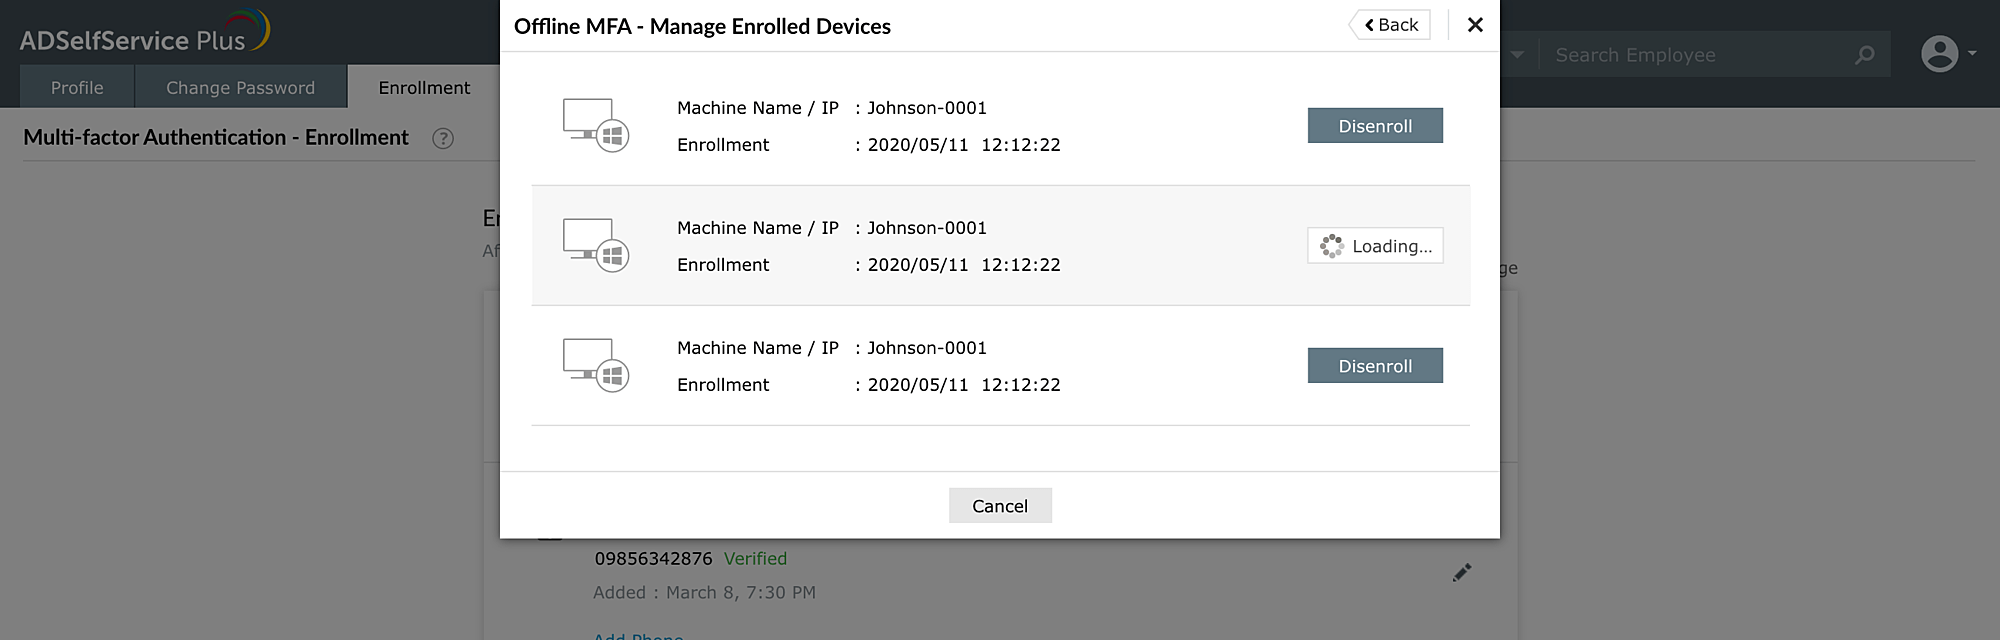
- You have now successfully disenrolled the particular machine from offline MFA. Repeat step 4 for all the machines you want to disenroll.
Note: The enrollment information will be erased only after this particular machine is connected back to the ADSelfService Plus server during online authentication.